Happy Monday, my dear crafty friends!
Here's a layout I made for National Scrapbooking Day! For me, it was more like National Scrapbooking Weekend. I had a ton to do but thankfully, I managed to get a personal project in. I hope you found some time to make at least one thing as well! In case you didn't and would like some ideas, I've included photos and instructions below if you'd like to make a similar project. :)
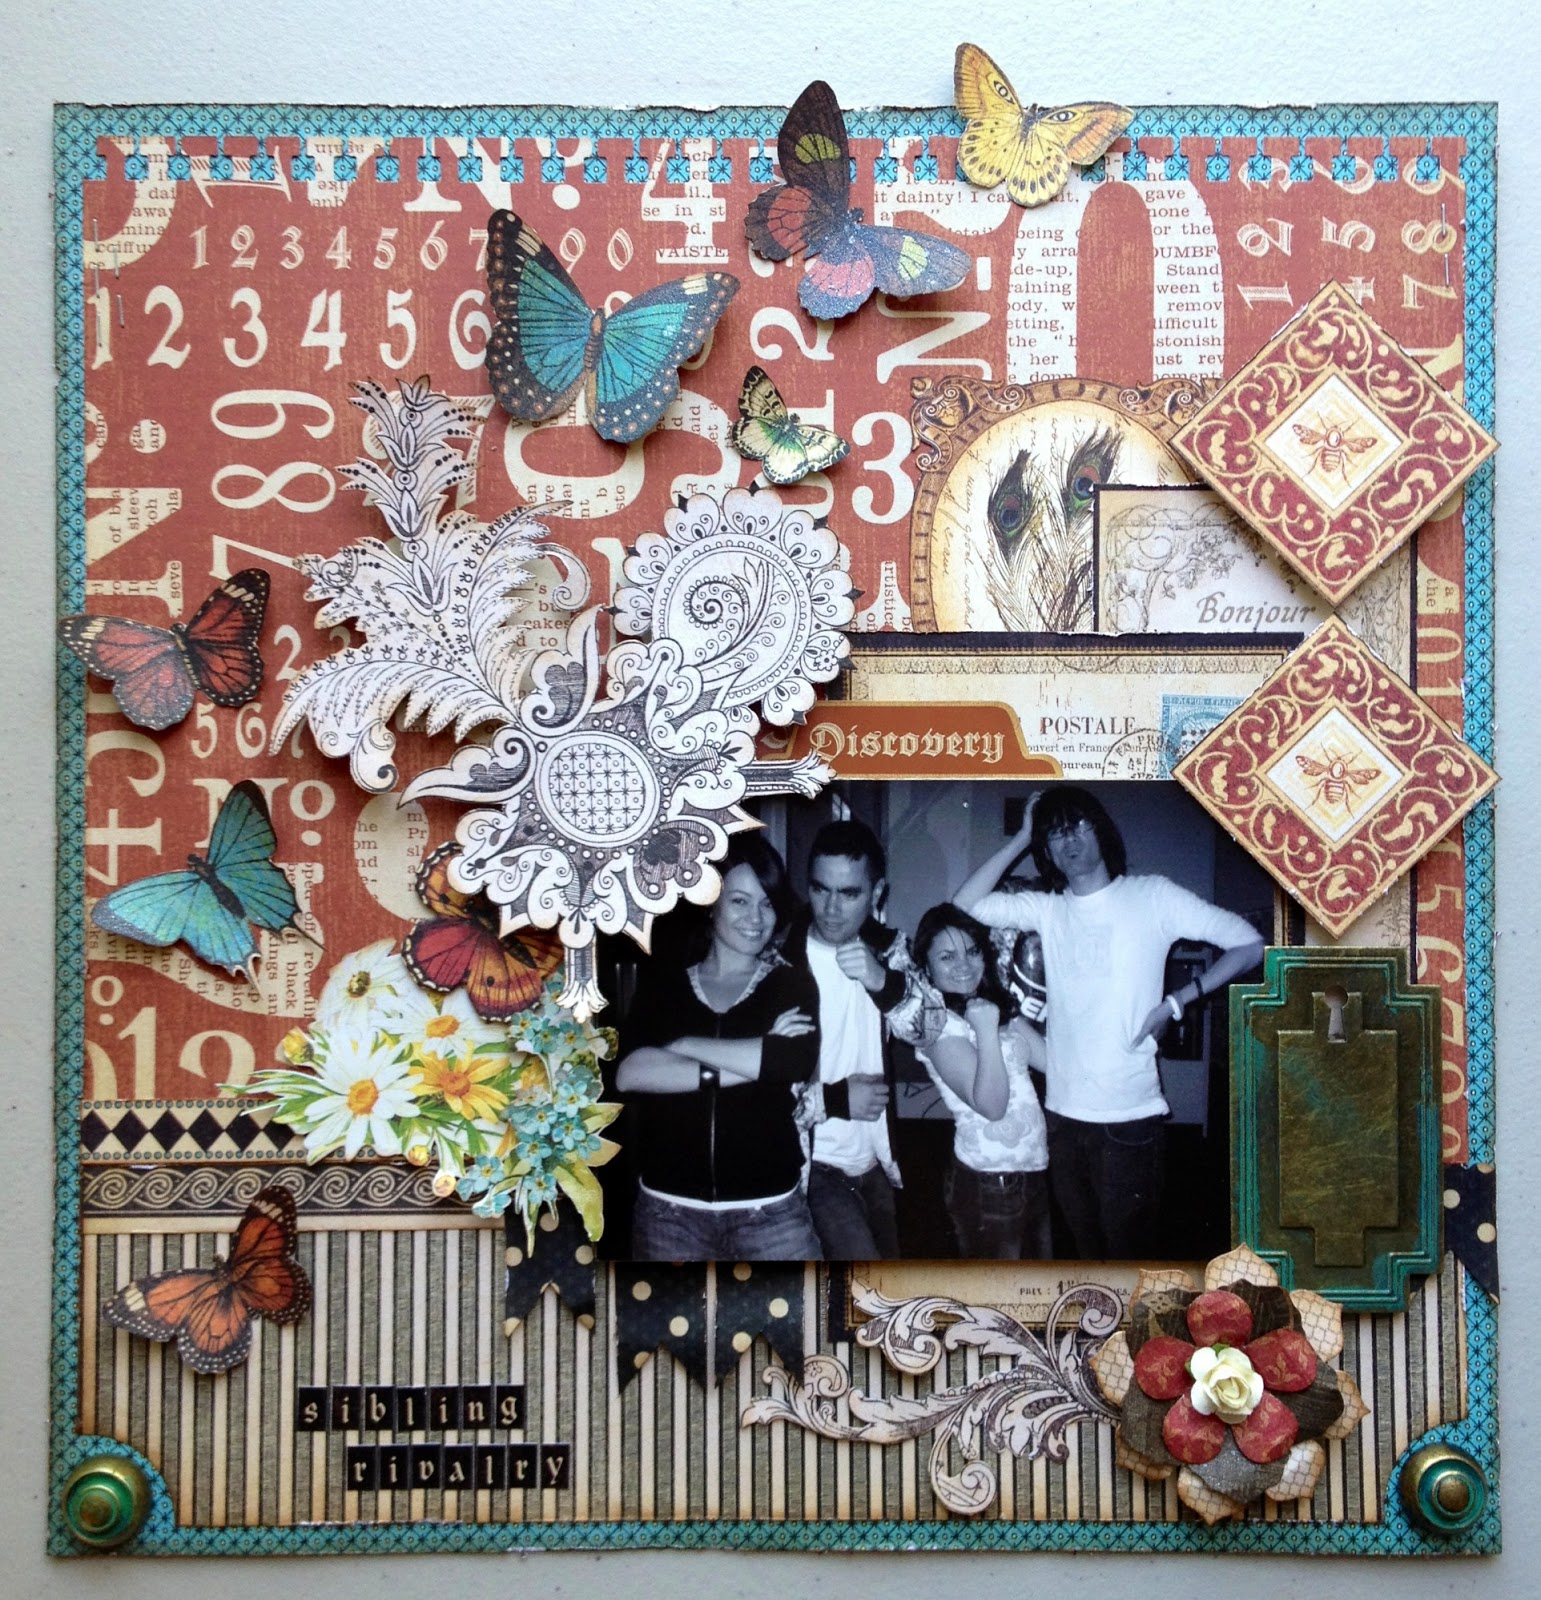
The photo below was taken back in 2007. It's a picture of me, my sister, and our brothers. (Somehow we were standing in order of oldest to youngest!) We were bowling with our cousin Liz and we just had a blast having fun and being silly. It's not often that you can photograph all 4 of us together - so this is one memory (and photo) that I never want to forget!
I wanted to use Olde Curiosity Shoppe because of the whimsical nature of the designs. My siblings and I can get pretty crazy together, so I felt the papers and color palette matched that moment perfectly. ;) I also wanted to use up some of my scraps and found things to use from a few other paper lines as well. And because I love dimension, I used plenty of foam dots and even corrugated cardboard to pop things up!
Supply List
BASE PAPER
- Background paper: 12" x 12" Olde Curiosity Shoppe - Exquisite Motif (teal side)
- Upper 2/3 paper: 11.5" x 8.5" Olde Curiosity Shoppe - Counting Down (number side)
- Lower 1/3 paper: 11.5" x 3.5" Olde Curiosity Shoppe - Optical Oddities (stripe side)
PHOTO MATS & BORDERS
- Large photo mat: 4" x 6" French Country - A La Carte (black border/"carte postale")
- Small photo mat: 2.75" x 4.25" French Country - Bon Appetit ("bonjour" list)
- Diamond border: 5" Olde Curiosity Shoppe - Olde Curiosity Shoppe
- Tiki border: 5" Tropical Travelogue - Tiki Voyager
FUSSYCUTTING
- Butterflies: Olde Curiosity Shoppe - Butterfly Specifics
- Bee frames: Olde Curiosity Shoppe - Parlor Wall
- Peacock frame: Olde Curiosity Shoppe - Parlor Wall
- Daisy flowers: Secret Garden - Beautiful Blooms
- Blue flowers: Secret Garden - Beautiful Blooms
- Large flourish: Olde Curiosity Shoppe - Mercurial Masterpiece
- Small flourish: Olde Curiosity Shoppe - Mercurial Masterpiece
BANNERS
- Black & white banners: (4) .75" x 1.25" Olde Curiosity Shoppe - Mercurial Masterpiece
EMBELLISHMENTS
- Metal Tag Staples
- Metal Button Staples
- French Country Flowers
- Flowers Staples
- Olde Curiosity Shoppe Stickers
- Olde Curiosity Shoppe Alphabet Stickers
- Olde Curiosity Shoppe Chipboard - butterfly
- Prima White Mini Rosette
- Distress Ink - Walnut Stain
- Glimmer Mist - Pearl
- Fiskars 1.5" circle punch
- Fiskars Notebook edge punch
- Fiskars scallop edge scissors
- Corrugated cardboard
- Foam dots
- Adhesive
Instructions
(Notes: Ink and distress each piece of paper before adhering.
Apply Glimmer Mist to all flowers and butterflies before adhering as well.)
Step 1: Place 12" x 12" Exquisite Motif paper teal side up.

Step 2: Take 11.5" x 3.5" Optical Oddities paper and apply a round circle punch to lower left and lower right corners. Adhere to Exquisite Motif paper, about .25" from the bottom.

 |
| Suddenly I'm thinking of Spongebob Squarepants. |
Step 3: Take 11.5" x 8.5" Counting Down paper and apply notebook edge punch across the top edge. Adhere to page, about .25" from the top.


Step 4: Take 5" long diamond border and adhere to left side of the page. Adhere 5" tiki border beneath.


Step 5: Arrange photo mats per photo and adhere. (Don't forget the "Bonjour" piece!)


Step 6: Adhere daisy flowers.


Step 7a: Locate (2) bee frames and large metal tag. Step 7b: Take your photo and adhere to corrugated cardboard; trim. Step 7c: Arrange items per photo and adhere using foam dots.


Step 8a: Take (4) .75" x 1.25" pieces from Olde Curiosity Shoppe - Mercurial Masterpiece and cut a pennant shape into the bottom of each. Use scallop edge scissors along top.

Step 8b: Bend and shape French Country flowers and kraft flower staple. Adhere pieces together per photo and attach small Prima rosette to center.

Step 8c: Locate small flourish. Arrange banners, flower, and flourish pieces per photo and adhere. Use foam dots to attach flower.


Step 9: Locate large flourish, blue flowers, and chipboard butterfly. Arrange pieces per photo then adhere with foam dots (adhere chipboard butterfly with regular adhesive).


Step 10: Arrange butterflies per photo; adhere. Attach alphabet stickers and "Discovery" sticker. Punch holes in lower left and right corners and insert with metal button staples.

Thanks so much for stopping by - have a great week, and don't forget to visit the Graphic 45 blog and Facebook page to see more sneak peeks of Bohemian Breeze and Steampunk Spells!! The fantastic team at G45 is giving away some fabulous prize packs - visit either link above for your chance to win one of the new Graphic 45 collections!
Many hugs,
Maria
12 comments:
Great collection and wonderful post. A big thanks for sharing with us !!
Maria! This is amazing! Love the layout and such a fun picture! Great tutorial too! Love the paper too! Hugs, Sandra
Great tutorial Maria! :)
Beautiful layout Maria! I love the fussycutting (love butterflies!!) and the metal accents. I also love the detailed tutorial with the paper measurements and so easy to follow. The spongebob comment cracked me up :D
You rock G45!!
Lovely layout. As an only child I so enjoy pictures of siblings. I received your Hope Chest Altered Book today and it is gorgeous as well, with instructions even I can follow! Many thanks.
Love it, and what a great pic of you and you sibs!
Paula
What a beautiful page and fantastic tutorial! Thanks so much for stopping by my blog and leaving me such a beautiful compliment.
I really enjoyed your blog Thanks for sharing such an informative post.
Very inspiring and creative post. You have done a really excellent job. I like your post very much. Thanks a lot for sharing !!
Wow, very informative tutorial. This is exactly what I was looking for. As I’m working on different image editing platform such as image post production and so on. So, I think this tutorial will help in my editing work as well. Thanks for sharing this. Please keep sharing more. I’ll be waiting for your next post. image post production
cut out way a graphics design and photo editing company who can give you 100% Hand Image Post-production ServicePhoto Cut out & Professional Ghost Mannequin ServiceProvider based on USA, UK, Canada, Denmark, Nether land and many more countries.
Well post you published here with us . I appreciate it.
Drop Shadow Services
Background Removal Services
Post a Comment