Good Morning!
This week, Graphic 45 is teaming up with Petaloo and Xyron for an amazing blog hop giveaway! To enter for a chance to win, stop by each blog and leave a comment!
1. Graphic 45 - http://g45papers.typepad.com
2. Petaloo - http://petaloo.typepad.com
3. Xyron - http://aintshecrafty.blogspot.com
It was so much fun making my project for the blog hop! Here it is:

I've had this 7 Gypsies tray for quite a while, and actually intended to use it for a different project. But when my Typography paper came in from Graphic 45, the black back drop seemed perfect!

I used some Perfect Pearls in Heirloom Gold all over for a warm "gold wash".

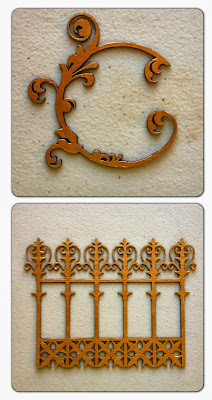
And have you heard of Gina's Designs? Oh my gosh, amazing chipboard pieces! That's where I got my letter "C" below, as well as the gate. Although, that's not really a letter, it's a flourish!


More amazing Petaloo flowers! I LOVE them!!

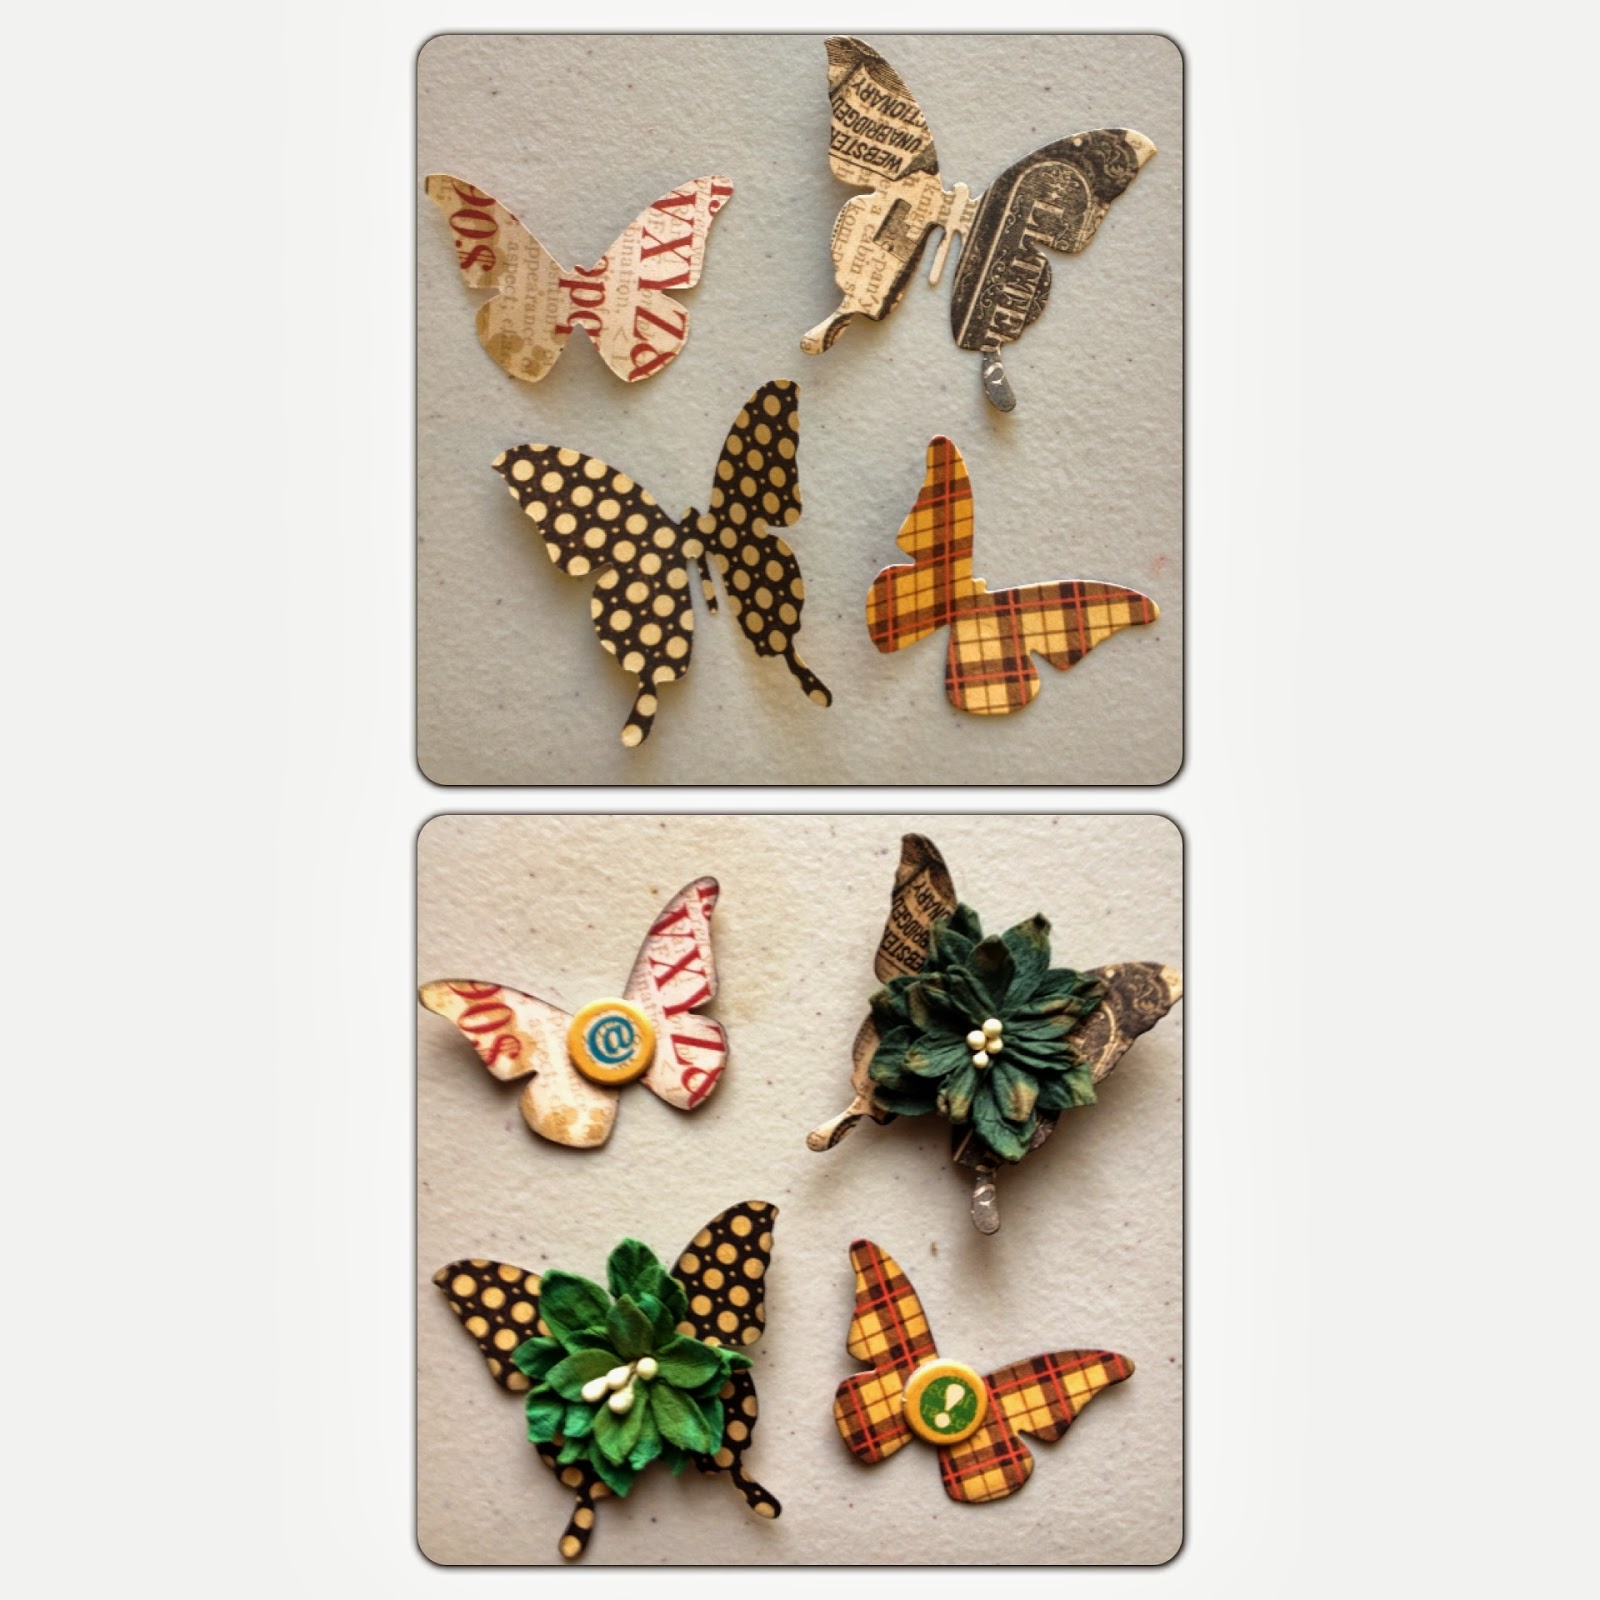
I used my Spellbinders Butterflies die to create the pretty butterflies throughout.


Would you like to make a similar tray? Below is my tutorial on how to make one just like this! Granted, you may not have all the pieces, but you can let your creativity flow and come up with something that's just your style! Don't forget to stop by Graphic 45's blog today to leave a comment for your chance to win! Hop over to Petaloo and Xyron as well for even more chances at winning some amazing prizes!


This week, Graphic 45 is teaming up with Petaloo and Xyron for an amazing blog hop giveaway! To enter for a chance to win, stop by each blog and leave a comment!
1. Graphic 45 - http://g45papers.typepad.com
2. Petaloo - http://petaloo.typepad.com
3. Xyron - http://aintshecrafty.blogspot.com
It was so much fun making my project for the blog hop! Here it is:

I've had this 7 Gypsies tray for quite a while, and actually intended to use it for a different project. But when my Typography paper came in from Graphic 45, the black back drop seemed perfect!

I used some Perfect Pearls in Heirloom Gold all over for a warm "gold wash".

And have you heard of Gina's Designs? Oh my gosh, amazing chipboard pieces! That's where I got my letter "C" below, as well as the gate. Although, that's not really a letter, it's a flourish!


More amazing Petaloo flowers! I LOVE them!!

I used my Spellbinders Butterflies die to create the pretty butterflies throughout.


Would you like to make a similar tray? Below is my tutorial on how to make one just like this! Granted, you may not have all the pieces, but you can let your creativity flow and come up with something that's just your style! Don't forget to stop by Graphic 45's blog today to leave a comment for your chance to win! Hop over to Petaloo and Xyron as well for even more chances at winning some amazing prizes!
 |
| Graphic 45's prize this week!! |
Typography Printer's Tray Tutorial
12” x 12” Graphic
45 Typography Typography
12” x 12” Graphic
45 Typography Inspire
12” x 12” Graphic
45 Typography Create
12” x 12” Graphic
45 Typography Inscribe
12” x 12” Graphic
45 Typography Journey
12” x 12” Graphic
45 Typography Imagine
Graphic 45
Typography Stickers
Graphic 45 Typography
Chipboard
Graphic 45
Ornate Metal Door Pulls
Graphic 45 Metal
Clothespins
Graphic 45
Chipboard Buttons Staples
Petaloo
Darjeeling Petites – Autumn
Petaloo Darjeeling
Mini Mix – Autumn
Petaloo Foliage
– Greens
Petaloo Dahlias
– Teastaine, Autumn, Grey/Blacks
Petaloo Daisies
– Grey/Blacks
Xyron Mega
Runner
Gina’s
Designs Small Fence
Gina’s
Designs Flourished Open Frames Medium
Spellbinders
Font One – Lowercase die
Spellbinders
Butterflies die
Perfect Pearls – Heirloom Gold
Stickles – Platinum
7 Gypsies Artist Printer’s Tray
Step 1. Take your Inspire paper and cut (6) 2.75” x 3.75” pieces.
Take your Journey paper and cut (3) 2.75” x 3.75” pieces. (Note: If you are
using a printer’s tray other than the 7 Gypsies Artist Printer’s Tray, you will
need to re-measure.)

Step 2. Take a big letter “C” and gate, like these ones from
Gina’s Designs, and apply gold paint.

Step 3. Take Create paper and cut out the letters “r, e, a, t, i,
v, i, t, y”. Take Imagine paper and fussy cut lady image. Fussy cut the images
from your Inscribe paper per photo.

Step 4. Gather (2) metal door pulls, (2) metal clothespins, some
chipboard button staples, and Typography chipboard.

Step 5. Gather a wide assortment of orange, yellow, black and grey
Petaloo flowers.

Step 6. Locate a bunch of different green Petaloo flowers and
leaves.

Step 7. Use a butterfly die to cut out (4) butterflies onto your
remaining Typography and Inscribe paper. Flip each butterfly so there is a
different pattern. Adhere Typography chipboard and Petaloo flowers on top.
Step 8. Use your Xyron Mega Runner to adhere your 2.75” x 3.75”
pieces to your printer tray per photo.

Step 9. Top row: Adhere metal door pulls and flowers onto Inspire
paper. Attach the alphabet sticker letters “F, A, L, L” to Journey paper along
with (1) clothespin. Use an alphabet die to cut out the letters “f, o, r” and
adhere to blank spot, along with fussy cut images and flowers.
Step 10: Middle row: Adhere large letter “C” with small flowers to
blank spot. Attach mini letters using foam dots to the rest of the row. Adhere
chipboard button staples, fussy cut images, and (1) clothespin.
Step 11: Bottom row: Adhere large flowers to far left spot. Adhere
gate, then fussy cut ladies and pen. Adhere flowers over ladies. Then, adhere
butterflies per photo.
Step 12: Optional: Apply Platinum Stickles to petals and Perfect
Pearls in Heirloom Gold all over frame.

6 comments:
I absolutely love this!!!
This is a gorgeous project!! Great instructions too!!
I have had my printers tray for months. Now, thanks to your great project and instructions I think I can create one. Thanks
Now I know what I'm using one of my stored printer's trays with. Gorgeous piece!!!
Thanks for showing... awesome !
Ohh Maria, this shadow box or printer tray if you will, is so pretty! Love the vintage feel you gave it! Really cool! Hugs, Sandra
Post a Comment