Showing posts with label Sizzix. Show all posts

Sunday, December 25, 2011

Merry Christmas! (Tutorial, too!)

May God bless all of you and fill you with his deep, everlasting love today and every day! 
And may you extend that same great love to everyone in your life. God loved us before we loved Him - what a tremendous gift and great example for us to follow! Let's show that same love to the world through kindness, friendship, and of course, creativity!


With that said, here is a little tutorial on making these tattered flower ornaments! (Look a little familiar? I used one of these for my last 12 Tags of Christmas undertaking. :)

Supplies: 


Old cardboard - preferably of the cereal box kind of thickness
Canvas
Burlap
Tulle
Brown ink, such as Tim Holtz's Walnut Stain or Gathered Twig Distress Stain
Baker's twine, preferably in red and white
Tattered Florals die (for this ornament, I used the largest flower)
Tattered Angels Glimmer Mist in Pearl
1/16" hole punch 
Tissue Tape

The cardboard base
1. Take your cardboard and cut (6) big flowers using the Tattered Florals die. 
2. Distress the edges of your cardboard flowers with Distress Stain and an emery board, or distress tool.
3. Crumple each cardboard flower by hand until each one has a slightly weathered look. 
4. Using a 1/16" hole punch, punch a hole on the end of one petal per flower. (This is where you will string your baker's twine through.) 
5. Punch a 2/8" hole in the center of each cardboard flower. Set aside.


The canvas middle
6. Take your canvas and cut out 12 big flowers. 
7. Lightly distress the edges of your canvas flowers with your fingers, scissors, or other distress tool. Ink the edges with brown Distress Stain. 
8. Punch or cut a 2/8" hole in the center of each canvas flower. Since this is fabric and it has lots of fibers, you may need to use your scissors to create cuts as a hole punch doesn't always work. 
9. Make (6) stacks of canvas flowers so that you have (2) canvas flowers per stack. 
10. Place each stack of canvas flowers onto a cardboard flower. Place each stack of flowers in a cardboard box and spray with Pearl Glimmer Mist. Let dry.


The burlap and tulle center
11. Take your burlap and cut 6 circles, about 3 1/2" in diameter. Don't try to make them perfect - part of the fun is making them a little lopsided as it produces better results! 
12. For each burlap circle you cut, fold the circle in half, then roll. Glue the bottom of your burlap together and use a paperclip to help the glue bond faster to your burlap. Remove paperclip when glue has dried, then set aside.
13. Cut your tulle into (6) 5" long pieces. Take a piece of tulle and fold it in half. Place one of your rolled up burlap pieces and place in the middle of your tulle. Do this for each piece of tulle and burlap. These are the center "blossoms" in your flower. 


Assembling your flower
14. Take each tulle-wrapped burlap and stick it through each stack of canvas and cardboard flower stack. 
15. Part of the tulle-wrapped burlap will be sticking out of the back of your flower, so just cover it with some Tissue Tape. 
16. Cut (6) pieces of 9" long baker's twine.
17. Run the baker's twine through the 1/16" hole you punched in each cardboard flower and tie.  


There you have it! Merry Christmas, everyone!

Thursday, December 22, 2011

December 2011 Girlie Grunge Challenge

Hello!

Boy, I feel like I haven't blogged in a month! The past couple of weeks I've been in Portland and Seattle visiting family and friends, not to mention, fighting off this icky head cold. So I haven't had a whole lot of time for papercrafting ... but I did manage to create two projects in one: a "little-piece-of-home" for my sister Therese (who very recently moved to Seattle) and my entry for Donna Salazar's December 2011 Challenge.

The requirements for the December challenge are to create a card, layout, tag, or altered project use denim, glitter, a Donna Salazar product, and two pictures (if creating a layout.) Since my sister recently moved to Seattle, and I want her to have a little piece of nostalgia and familiarity with her, I thought I'd focus the challenge on a layout of the two of us. I ended up using the Creative Scrappers sketch #185 as a starting point for my layout. (Thanks again, Natasha!)

Here is my layout:


First, I distressed the edges of a piece of cardstock and used it as the base for my layout. I then took a piece of SEI paper from Paper Mermaids and ran it through my Distrezz-It-All, then glued on top of the cardstock. My Distrezz-It-All (DIA) was an early Christmas present my husband got me from Paper Mermaids. This tool is AMAZING! I love the ripped up, grungy, tattered effect it gives your projects. I've been drooling over one ever since I started following the Girlie Grunge Ning, as well as learning more about Donna and her playful style!

I cut out flowers from another piece of SEI paper, then rolled some of the edges to give the flowers more of a dimensional look.


The big purple flower and smaller dark purple flower were made with my DS Rose Creations die. I dusted the edges of the larger purple flower with glitter, which I'm sure has transferred onto my sister by now. (Just kidding, Therese!) The other flowers on my layout include a purple Mulberry Street flower and a tiny Prima flower, both leftovers from my Paper Mermaids stash.


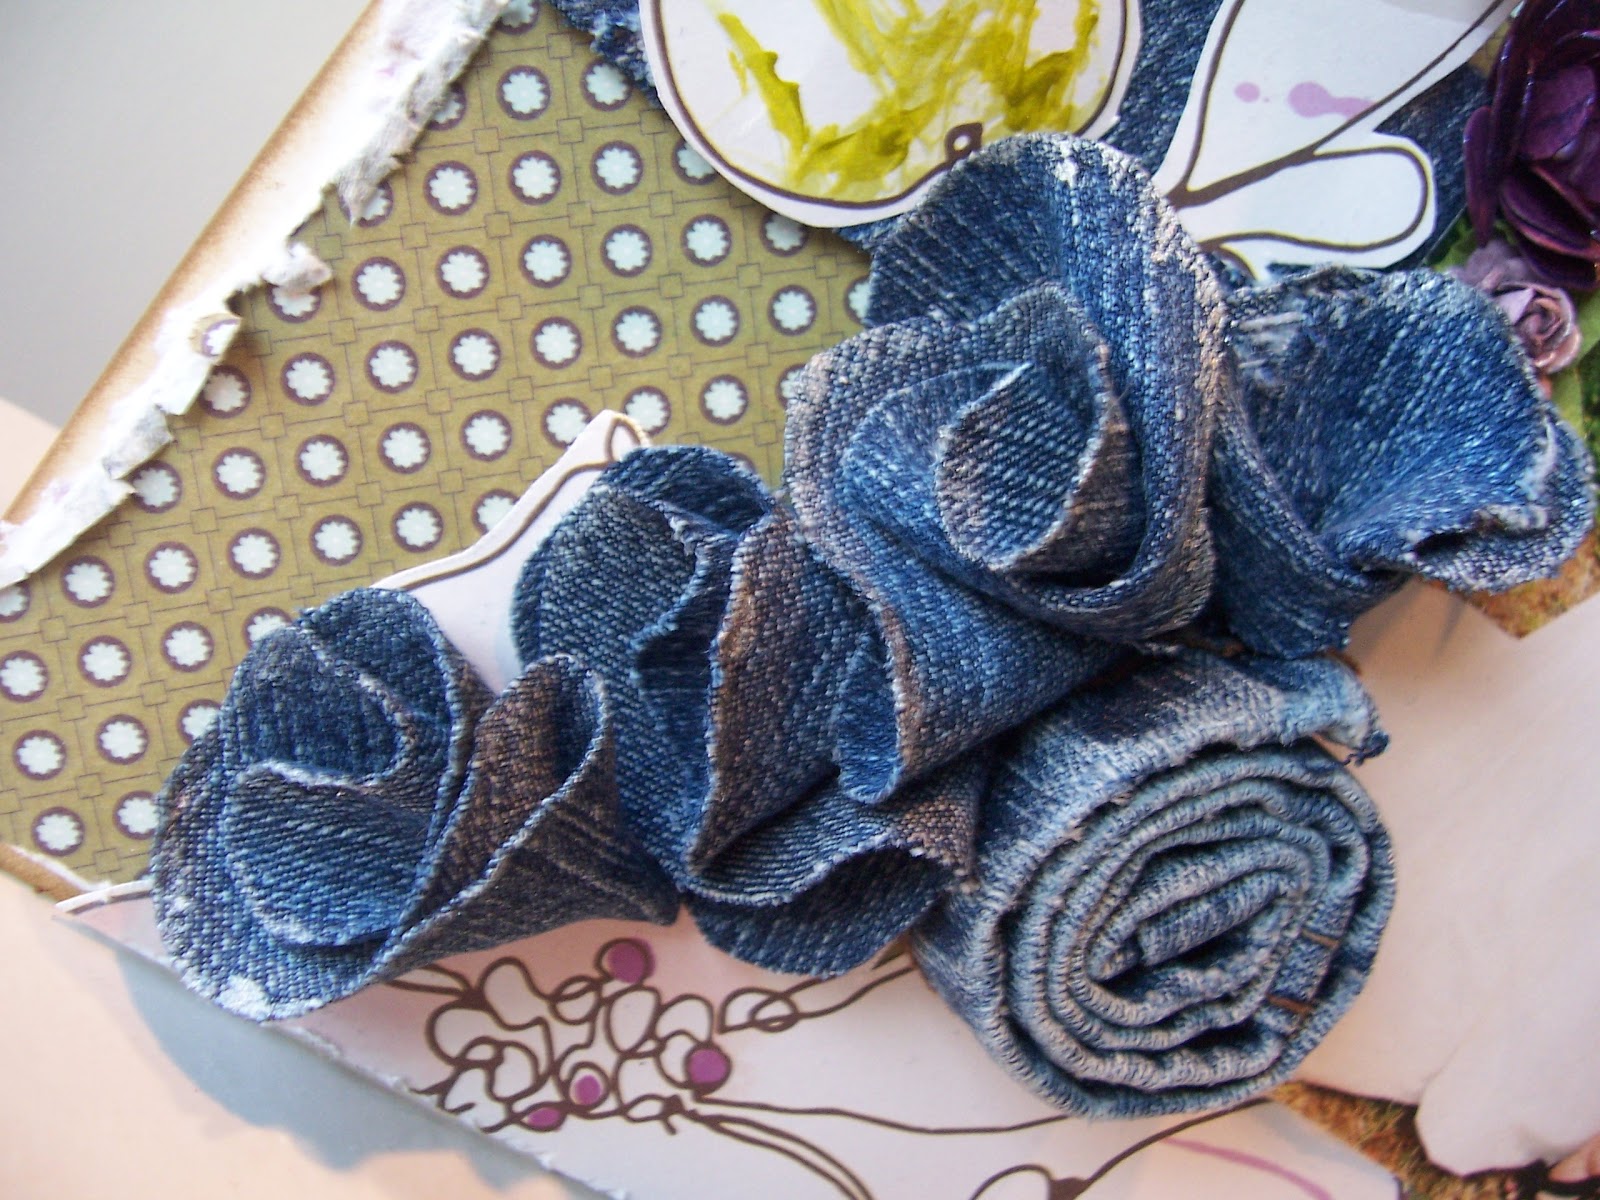
Now, for the denim ... I cut up the hem of a pair of jeans, rolled them up, and turned the piece into a rosette.


Next, I took several pieces of denim, cut each one into a circle shape, then folded into a flower shape. I applied some Smooch pearlized ink (from the blog candy I won recently) to my denim flowers, then glued them to my page to create a cascading effect.


I cut a few strips of denim, cut and ripped up the edges, then glued onto my layout.

The sentiment was created using my Tim Holtz "Vintage Lace" die and his "Once Upon a Time" die, a recent Christmas present from Portland. I applied some glitter on the paper lace strip below my sentiment.


It definitely helped having a sketch to work from. I must admit, it made creating a 12x12 layout less intimidating. I think I'll do more of these in 2012. Till then, thank you for looking, and have a wonderful day!

Supplies:

SEI "Couture" paper
DS Zutter Distrezz-It-All
DS Rose Creations die
Smooch pearlized ink
Tim Holtz Vintage Lace die
Tim Holtz Once Upon a Time die
Walnut Stain Distress Ink
Mulberry Street flower
Prima flower
Restaurant doily (Save these!!)

Sunday, December 11, 2011

Tim Holtz: 12 Tags of Christmas - Tag #11

Good morning! Are you sad that the 12 Tags are almost over?? I am, but I'm sooo grateful for all the new techniques that Tim has taught us. I feel like I have a much better understanding of his products and how to use them. I think 2012 is going to be quite the creative year!

If you haven't checked out Tim's eleventh installment in his 12 Tag series, click here. His tag is so bright, cheery, and fun!

Since I don't have Tim's stamps, I ended up using a Santa stamp that my in-laws gave me and my trusty embossing pen. If you're in a pinch and need a sentiment but nothing you have will work, create your own with an Inkssentials embossing pen. Carol from Paper Mermaids turned me onto these bad boys! You get a black pen and a clear one. The black pen allows you to see what you're writing but I prefer the clear one. There's something alluring about not knowing what your image will look like until it's embossed. :)


I don't have Tim's shrink plastic so I ended up embossing a clear piece of packaging, similar to what he did with his fourth tag. To give my plastic snowflakes some dimension, I applied some Claudine Hellmuth Studio Gloss and Aqua Stickles.


Well, that's all, folks! Thanks for looking, and as always, thank you for your sweet and encouraging comments! I just love how many new friends I've made across the globe, simply from this amazing tag challenge!


Supplies:

Movers & Shapers Carved Ornament die
Broken China, Chipped Sapphire, Barn Door, Peeled Paint, & Black Soot Distress Ink
Aqua Stickles
Snowflake texture fade from Tim's Joy set
Tattered Angels Glimmer Mist in Pearl
Claudine Hellmuth Studio Gloss
Inkssentials Clear embossing pen
Ranger black embossing powder

Saturday, December 10, 2011

12 Tags of Christmas - Tag #10

Sheesh, we're two hours from Tim's next tag, and I barely finished today's!

If you're following along with the challenge, you've obviously seen Tim's festive facet tag. I love the look of facets and I love his musical stamp, but I am seriously lacking those (and many other) Tim products, so I had to improvise with what I have on hand.

I didn't get to create this tag until tonight, so please forgive me for the dark, blurry photos! Here is my tag:


I embossed my background with the Bricked Texture Fade folder. I figured an embossed background is always better than no background!! You can see a little bit of the bricks here: 


Instead of facets, I used my Movers & Shapers hearts with some wings made from Autumn Gatherings. The piece behind my hearts is a Movers & Shapers label that I cut out using corrugated cardboard.


I don't have Tim's alphas, so instead I used some Salvage stickers of his for the sentiment. Here is a really dark photo ... 


Thanks for looking!! Now, off to check out some of your creations ... :)

Supplies:

Movers & Shapers Labels
Movers & Shapers Hearts
Forest Moss Distress Stain
Black Soot, Gathered Twig, & Barn Door Distress Ink
Ranger gold embossing powder
Bricked Texture Fade embossing folder
Salvage Stickers
Urban Grunge stamp

Friday, December 9, 2011

Tim Holtz: 12 Tags of Christmas - Tag #9

Good morning! Forgive me for rushing through this, as I'm rushing off to work ...

Tim's ninth tag uses a really neat technique that I definitely plan on using on lots of future projects! Check out his blog to see his latest beautiful tag.

Here is my rendition of Tim's tag:


My tree is made from Tim's Bricked & Woodgrain embossing set. I applied some crackle paint for an aged frosty look. My festive bunch is actually made from my Autumn Gatherings die and has an icy application of liquid pearls here and there. I don't have clear embossing powder (yet) so I used Tim's technique on these Movers & Shapers butterflies instead:


For the sentiment, I wrote the word "Peace" with my clear Ranger embossing pen and applied Tim's embossing technique to it. Glossy accents on top and secured by one of Tim's metal plate holders.


I know I went a little overboard with embossing my sentiment ... I tried to get a salt and pepper-ish type of effect but it got a little muddled. Er ... For my background, I embossed my tag with my Regal Flourish texture fade folder, another gorgeous one of Tim's.


That's all folks, have a wonderful day!! When I get home from work I will check out your creations and see what you've done with today's tag!

Thursday, December 8, 2011

Tim Holtz: 12 Tags of Christmas - Tag #8

Whew! What a tag Tim has created today! He has truly outdone himself with his Christmas-y steampunk tag for the eighth tag of Christmas. Click here to check it out.

This tag was the most challenging for me to try out, as I don't have Tim's whimsical steampunk dies or specific Idea-ology trinkets (yet).

Here is my version of Mr. Holtz's tag for the day:


At first, I hated the background on my tag, so I flipped it over and started again. I tried my hardest not to use other brands' products merely because I wanted to get as much of a Tim Holtz effect as possible, so I limited myself to a tiny sprocket stamp and a clock stamp from another brand. As for embellishments, I used a TH Word Stick, bingo trinket, ball and chain, and fragment charm. Some metal buttons, a piece of chipboard, wire, and a bottle cap from some Lindeman's Framboise were fun little pieces that I had lying around the house.


I don't have the fun Steampunk gentlemen stamp, so I used my bird stamp (put a bird on it! ;) and cut out my own tiny ivy pieces. I inked them with Forest Moss Distress Stain and used liquid pearls in place of berries.


For the right side of the tag, I cut out my Townscape die using grungepaper and applied some Vintage Photo Distress Stain over it. What's really cool is the effect this color of Distress Stain has on grungepaper - it almost creates a cork-like texture and look! I used Black Soot Distress Ink to give the buildings a smoky, industrial look.


I love Tissue Tape ... so I placed a tiny piece in the upper righthand corner. And because this is a Steampunk tag, I made a funky wire "ribbon" invention to protrude from behind the tag. (Secured by Tissue Tape and Glossy Accents, of course.)


Thank you for looking, have a great day!!

Supplies:

Vintage Photo & Forest Moss Distress Stain
Idea-ology Work Stick, Fragments, Ball & Chain, and Bingo game piece
Ranger Liquid Pearls
Rock Candy
Crackle Accents
Glossy Accents
Black Soot, Gathered Twig, Barn Door, Pine Needle, & Peeled Paint Distress Ink
Townscape die
Urban Grunge stamp
Tissue Tape
Grungepaper
Ranger Black embossing powder

Graphic 45 Holiday Tag Challenge

Good morning!! So there are a quite a few challenges going on right now ... are you doing any, and if so, which ones?

A short while back, I learned that Graphic 45 is hosting a holiday tag challenge! To participate, all you do is create a tag with G45 paper and products and post your finished piece on their Facebook page.

For my tag, I used some Christmas Emporium paper for the sentiment and a piece of Once Upon A Springtime in the background. I used some festive red plaid Communique paper as well as a hint of Curtain Call. (Everything I used to create the tag was found in my stash!)


The brown flower was made using Graphic 45 Flower Staples. My green flower was made using my Tim Holtz Tattered Florals die, similar to the one I created yesterday. 


I tried several kinds of ribbon as well as tulle and jute, but nothing I ran through my tag seemed to look right. So what better "ribbon" to use for a G45 tag than Graphic 45 paper itself?? Hence, the curled Communique paper that's peeking out from my paper flowers.


Thanks for looking!! Now, onto more holiday projects ... :)

Supplies:

Graphic 45 paper - Christmas Emporium, Communique, Once Upon A Springtime, Curtain Call
Graphic 45 Flower Staples
Tim Holtz Tattered Florals die
Tim Holtz Vintage Lace die
Copper Stickles
Bo Bunny Brads
Tim Holtz Gathered Twig Distress Ink

Wednesday, December 7, 2011

Tim Holtz: 12 Tags of Christmas - Tag #7

It's another gorgeous day on the Oregon coast ... and Tim has created an equally gorgeous tag! I love it when Tim uses his dies and other embellishments to create beautiful clusters of greenery. Anything involving flowers is amazing in my book!

Here is my version of Tim's tag:


The background was distressed with Gathered Twig and Spun Sugar Distress Ink. Some Crackle Paint in Old Paper was applied here and there ... I stamped the tag but my silly camera washed out the background so you can barely see it. (Hope you're taking notes, Santa.) Since I don't have the holly die, I used my Tattered Florals die instead. I used Forest Moss Distress Stain along with Peeled Paint and Gathered Twig Distress Ink, then applied some Copper Stickles to the ends of the petals.

I used my Urban Grunge stamp for the sentiment as I don't have any of Tim's lovely Christmas stamps (yet). I think it's all right, as there's lots of LOVE in Christmas! I decided to put my lace through the top of the tag so that I could play around with some burlap and ribbon fiber that I picked up yesterday.


I can't wait to check out everyone's tags for the day! Happy crafting ... :)


Supplies:

Gathered Twig, Spun Sugar, and Peeled Paint Distress Ink
Walnut Stain Distress Ink
TH Reinforcers
Tattered Florals die
Crackle Paint in Old Paper
Bo Bunny brads
Ranger Embossing Powder in Black
Urban Grunge stamp
Copper Stickles

Tuesday, December 6, 2011

Tim Holtz: 12 Tags of Christmas - Tag #6

Good morning!! It is a BEAUTIFUL day here on the Oregon Coast ... the sun is shining, the water is sparkling, and a romantic white mist is hovering over Yaquina Bay. Here's a picture right now from our living room:


All right, enough winter beauty! Speaking of beauty, Tim's tag for the day is all about creating a vintage Christmas tin look. To check out tag #6, click here.

I had to use tin foil for this project since I don't have Tim's specific kind ... I also used some white acrylic paint and some leftover beads from a project a few years ago. Santa's gonna have to bring me some more Tim stuff ... :) With that said, here's my take on Tim's tag for the day:


I made my own wreath since I don't have his lovely wreath charm. Since I'm stuck with my white acrylic paint, I thought I'd make my tag have a slight icy look, so I applied some glitter using Glossy Accents.


For the background, I ran my tag through my Big Shot using the Damask Texture Fade folder. It's a gorgeous embossing folder that also comes with Tim's "Regal Flourish" texture fade folder. I then applied a thin coat of white acrylic paint and used Walnut Stain to accent the texture. Just for fun, I colored in select letters with one of my Marvy LePlume markers.


You can't see it yet, but I decided to put some Rock Candy on my red letters to give my tag one more bit of dimension.

Thanks for looking and have a beautiful, inspired day!

Supplies:

Rock Candy
Glossy Accents
Damask Texture Fades
Walnut Stain Distress Ink
Joy Texture Fades
Marvy LePlume marker

Monday, December 5, 2011

Tim Holtz: 12 Tags of Christmas - Day #5

Today is the fifth day of Tim's 12 Tags of Christmas. To see Tim's beautiful tag, click here.


For the holly wreath, I used my Tim Holtz Rosette die and punched little holes on the ends:


And some Fragment charms, just like Tim's (although, his tin foil turned out a million times better):


Thanks for looking, have a great day!!

Supplies: 

Fired Brick Distress Stain
Barn Door, Black Soot, Pine Needle, & Peeled Paint Distress Ink
Stickles
Ranger embossing powder
Tim Holtz Urban Grunge stamp
Fragments
Tim Holtz Alterations Rosette die

Sunday, December 4, 2011

Tim Holtz: 12 Tags of Christmas - Tag #4

Good morning! Tim's icy 4th tag is absolutely beautiful -- and my favorite so far! I love the tulle, snowflakes, and blistery pale blues and white ...

For my take on Tim's tag, I wanted to create the same snowy effect, but didn't want my fourth tag to resemble my first tag too much. So I added some red and black tulle versus the white tulle ... and toned down my snowflakes.


Instead of a top hat, my snowman's sporting a silver crown. I did this by stamping Tim's Urban Grunge crown stamp onto some grungepaper, then embossing with silver powder. 


My snow flurry was created using Ranger Sea Foam embossing powder ... and tiny pieces of styrofoam. 

Thanks for looking and have a great day!

Supplies: 

Tim Holtz - Urban Grunge stamps
Grungepaper
Snowflakes embossing folder from "Joy" embossing set
Broken China Distress Ink
Rock Candy
Glossy Accents
Crackle Accents
Aqua Stickles
Sizzix Snowman
Tattered Angels Glimmer Mist in Dragonfly
White flocking powder
Bo Bunny brad

Saturday, December 3, 2011

Tim Holtz: 12 Tags of Christmas - Tag #3

Today is day 3 of Tim Holtz's 12 Tags of Christmas! Tim's tag has a Christmas typography theme which you can see here. I love the raised look of the letters on this tag -- it is definitely festive!

Here is my take on Tim's tag:


On the bottom of the tag, I thought I'd try out my Vintage Lace die. Super-quick-mini-tutorial about to follow on how to make my snow flower.


You know what I discovered that is soooo cool? When you cut out the lace strips above, you're actually left with 4 other shapes that aren't too shabby themselves: 


I think the middle shape is pretty interesting - it would be great for making pennants! Back to the tag ... I actually used one of these lace strips to create the snow flower on my tag. 


Just cut it up, ink each piece, glue together, and throw some Glossy Accents and glitter on top.


I did a lot of sanding on this tag. For areas that I completely pulverized, I went over them with a Marvy LePlume marker to bring color back to dedicated areas.


Other areas where I sanded, I was able to go over them with Broken China to create a really aged look. 


I am excited to see everyone else's creations today. So far, everything I've seen from the TH community has been so amazing. To see lots of pretty tags, just visit Tim's blog and scroll down to the bottom of his post. Thanks for stopping by! 

Supplies:

Vintage Lace decorative die
Autumn Gatherings die
Black Soot, Gathered Twig, Broken China, & Pine Needle Distress Ink
Barn Door, Walnut Stain, & Forest Moss Distress Stain
Stickles
Crackle Paint
Tissue Tape
"Joy" embossing set