Showing posts with label Place In Time. Show all posts

Thursday, October 31, 2013

Happy Halloween! And a layout, too!

Happy Halloween, everyone!

Are you ready for all the trick-or-treaters? Sadly, the Halloween candy did not last - so ... it looks like another trip to the store so all those kiddos are happy!

Today on Graphic 45's blog, you can see a couple fun Halloween projects that Miranda and I made! I won't spoil what Miranda made, so feel free to head over to see her beautiful Halloween home decor project.

And here's mine, a layout made with Place In Time, Steampunk Spells, and even a little Mother Goose. I also used a lovely Petaloo flower and foliage, along with some of my favorite Spellbinders dies!


Supplies


Graphic 45 Metal Brads
Core’dinations Bordeaux (Purple)
Core’dinatinons Photogenic (Black)
Spellbinders Rose Creations die
Spellbinders Fantastic Flourish 2 die
Spellbinders Gilded Gate 2 die
Petaloo Mini Daisies - Greys/Blacks
                                                                                 Petaloo Foliage
Petaloo Daisies - Greys/Blacks


That's all, ladies and gents ... have a hauntingly fun Halloween!!

Maria

Friday, October 11, 2013

October Layout Tutorial

Happy Friday!

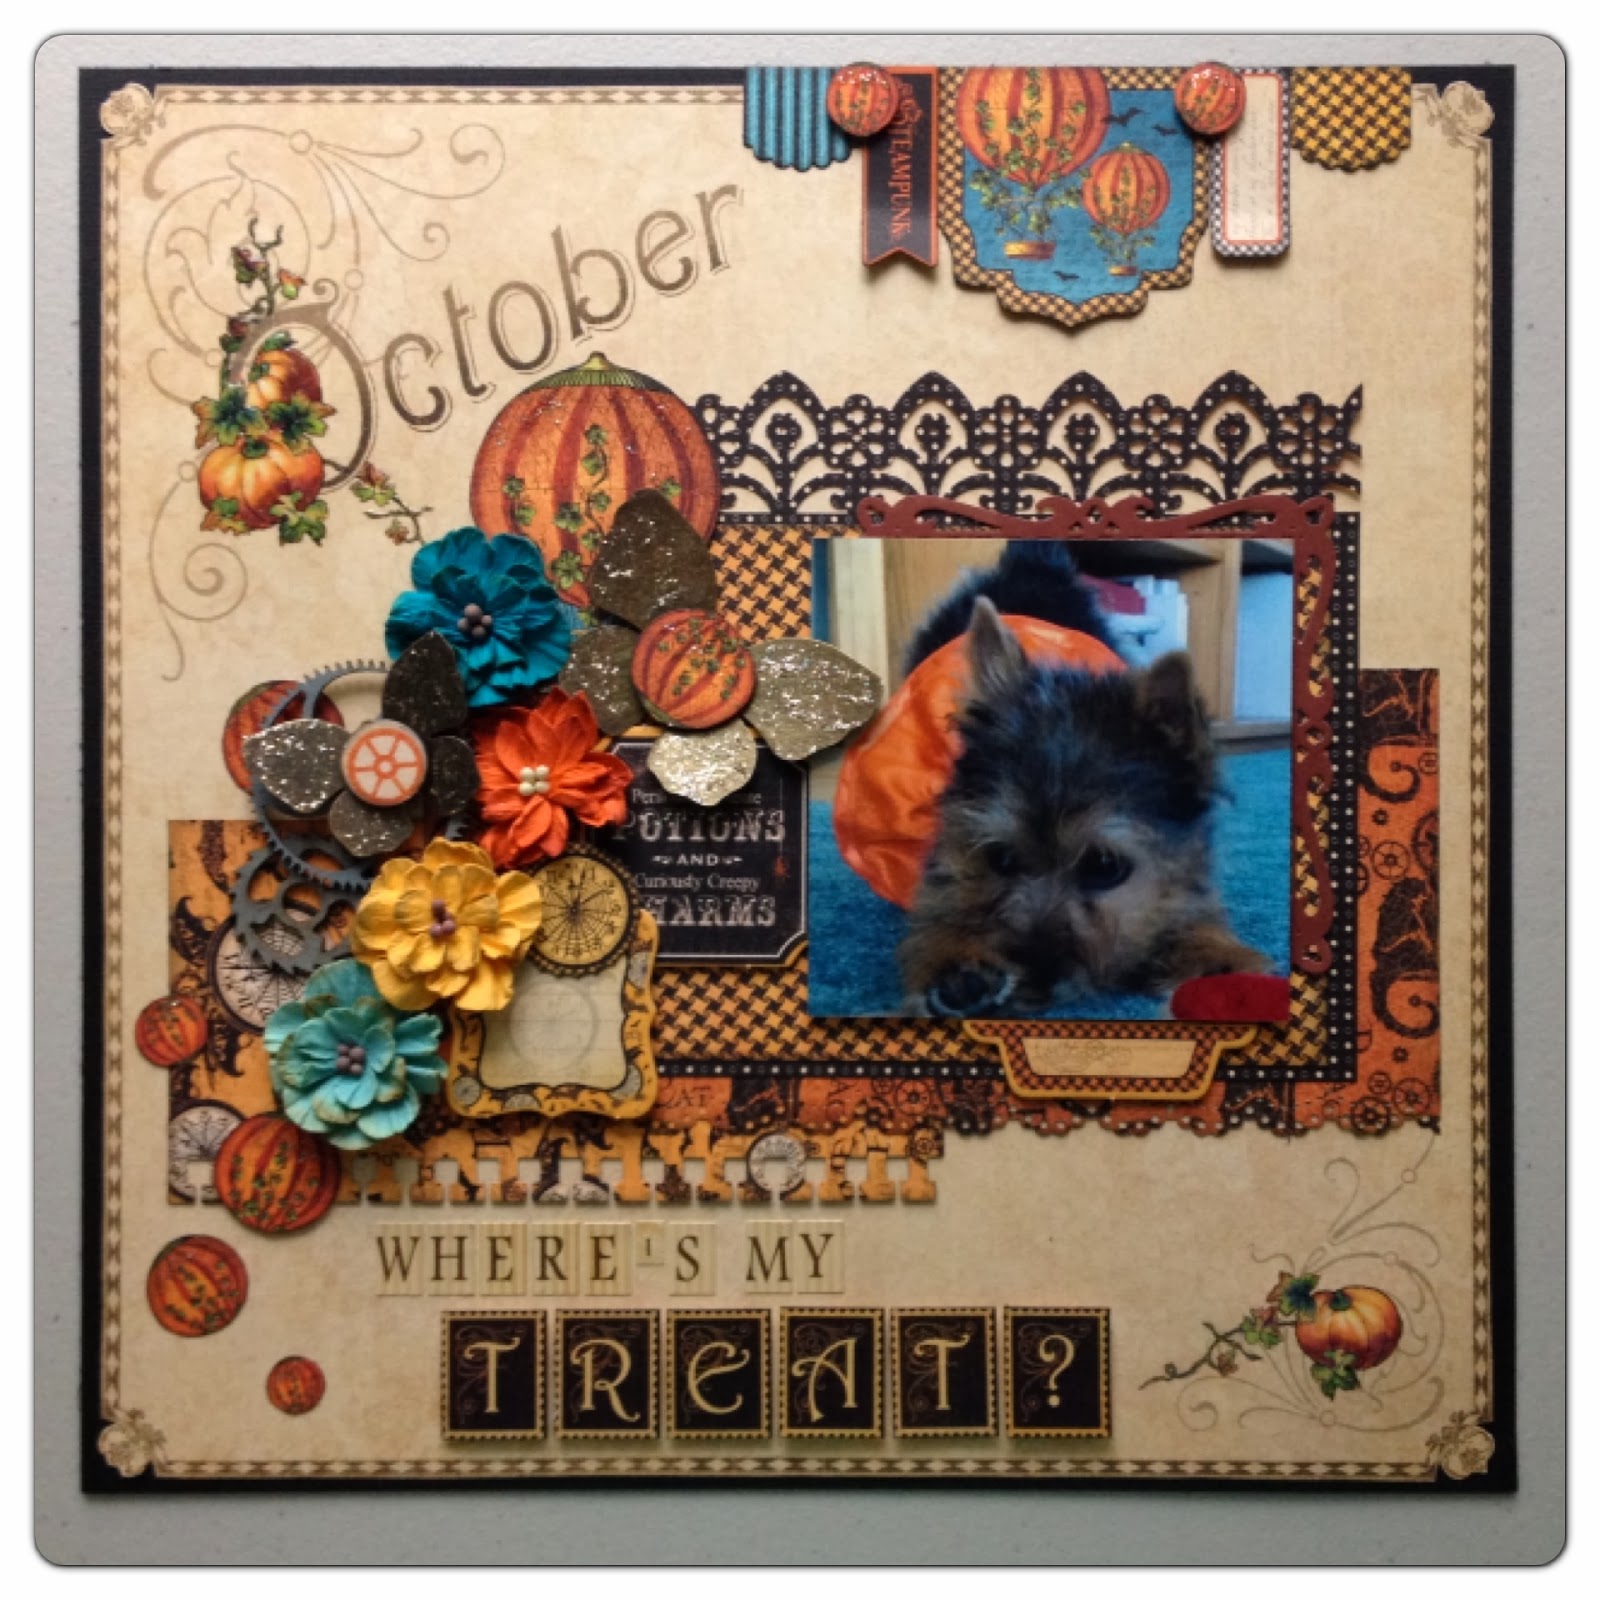
I wanted to share a layout of mine that was shared on the Graphic 45 blog this week. :) I used Graphic 45's Place In Time and Steampunk Spells paper to create this layout of my in-laws adorable little Norwich Terrier, Rosie. If you scroll a little further, I have a step-by-step tutorial on how to make it!


"Where's My Treat?" October Layout Tutorial

12” x 12” Place In Time October Foundation
12” x 12” Steampunk Spells Beware
8” x 8” Steampunk Spells Pumpkin Power
8” x 8” Steampunk Spells Tick Tock
Steampunk Spells 6x6 pad
Steampunk Spells Banners
Steampunk Spells Chipboard
Graphic 45 Metal Butterflies
Place In Time Alphabet Stickers
Petaloo Dahlias – Aquas, Autumn
Petaloo – chipboard gears
Core’dinations – Photogenic (Black)
Spellbinders Captivating Squares
Stickles – Platinum
Ranger Glossy Accents

Step 1. Fussy cut the edge of your 12” x 12” October Foundation, then adhere on top of black cardstock.


Step 2. Cut Beware paper to 8.5” wide x 4” tall. Apply your favorite border punch along the bottom.

Step 3. Take a black polka dot pattern from your 6x6 pad. Apply a border punch to the top, such as Martha Stewart’s Garden Gate punch. Next from your 6x6 pad, take your darkest solid orange pattern and use a die like Spellbinder’s Captivating Squares to cut a 4.25” x 4.25” square.

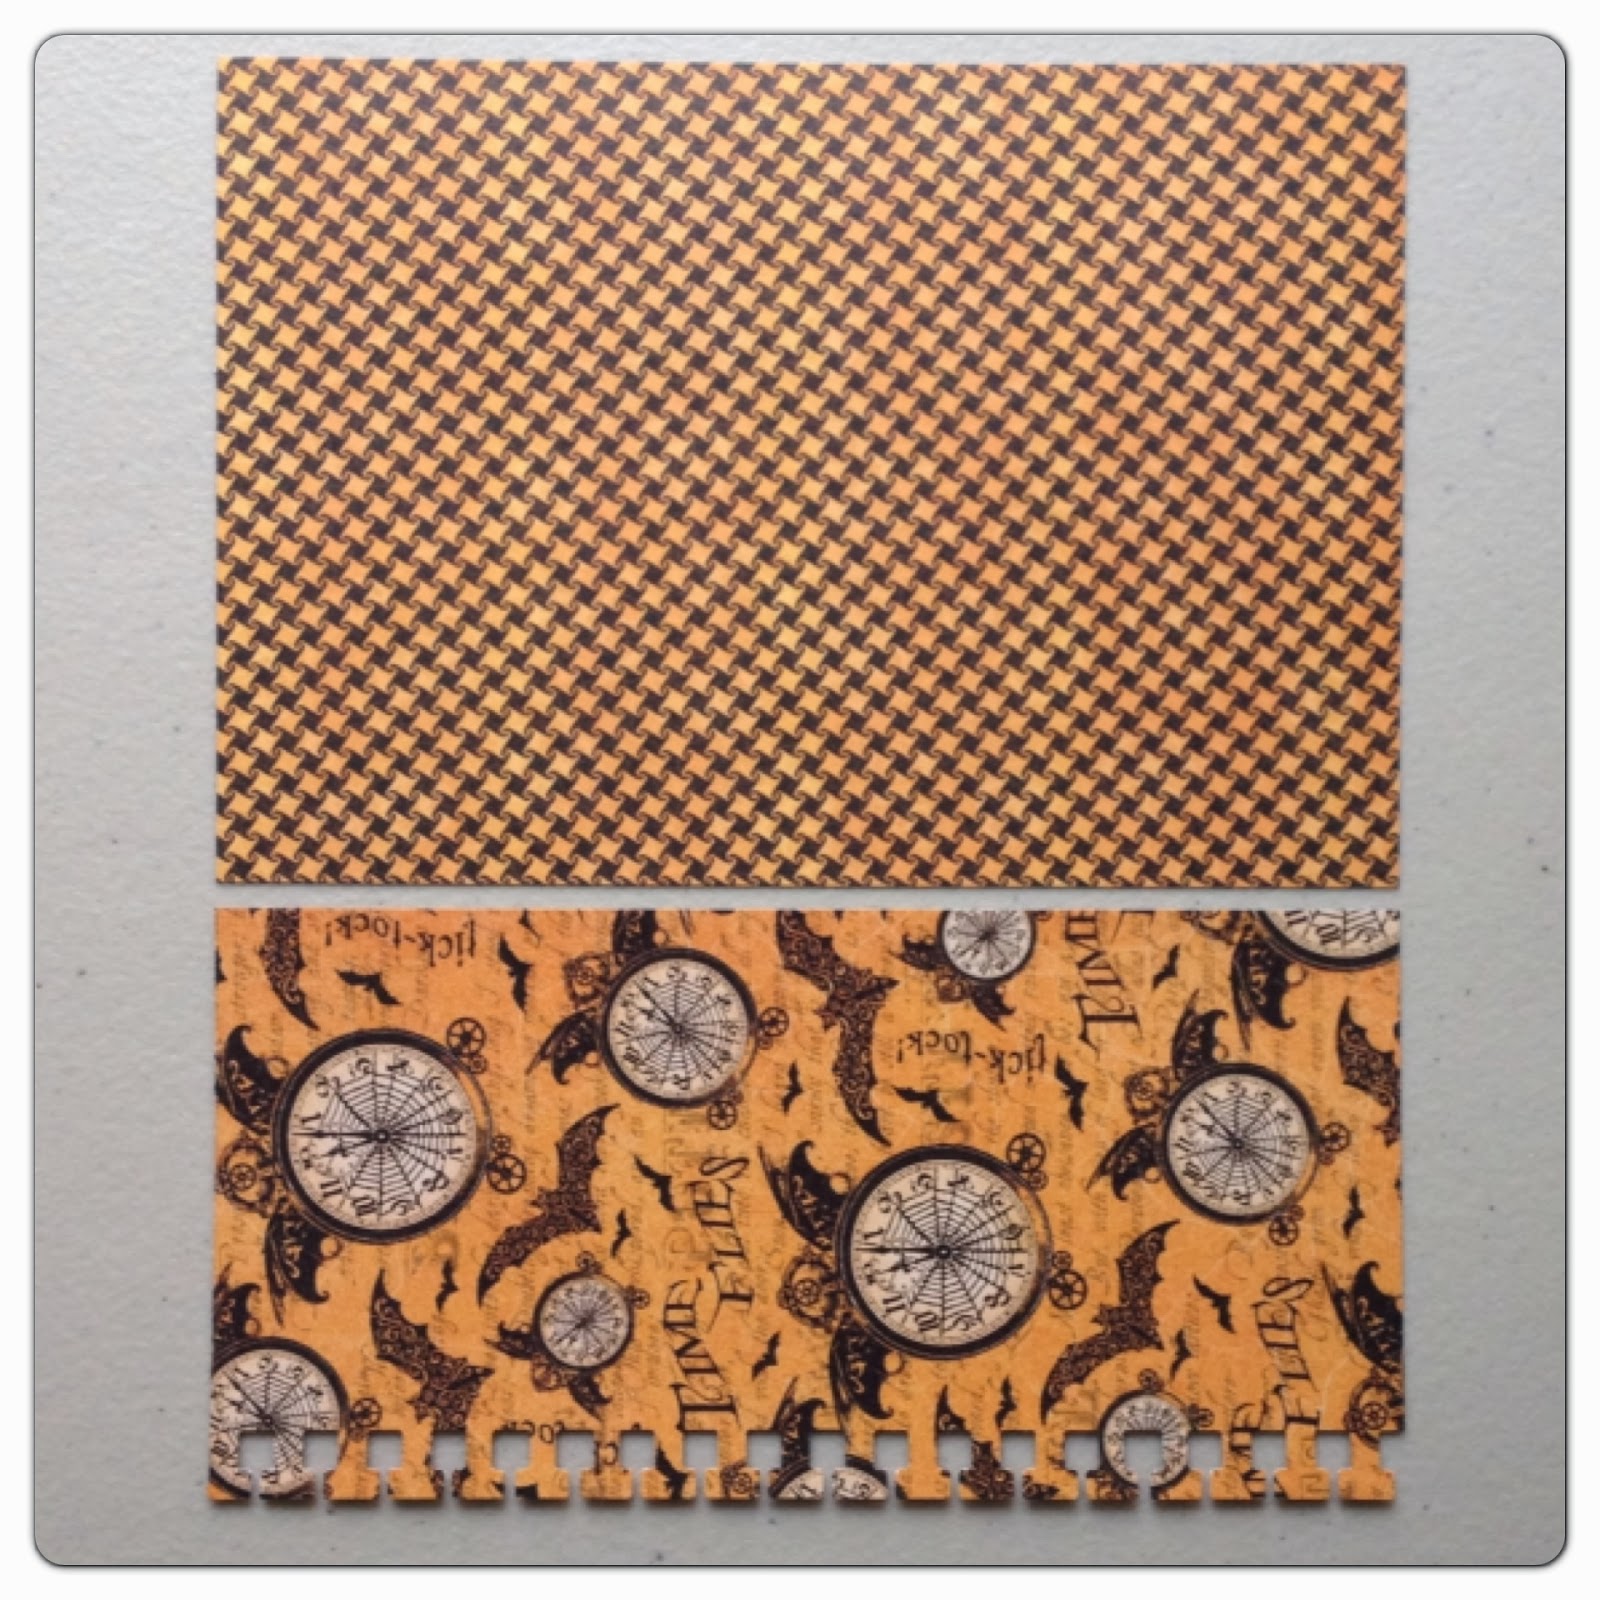
Step 4. Take your Tick Tock paper and cut (1) 6.5” x 3.5” and (1) 6.5” x 4.5”. Use a border punch along the bottom of your 3.5” tall piece and use the clock side. Flip your 4.5” tall piece over to reveal hounds tooth pattern. 

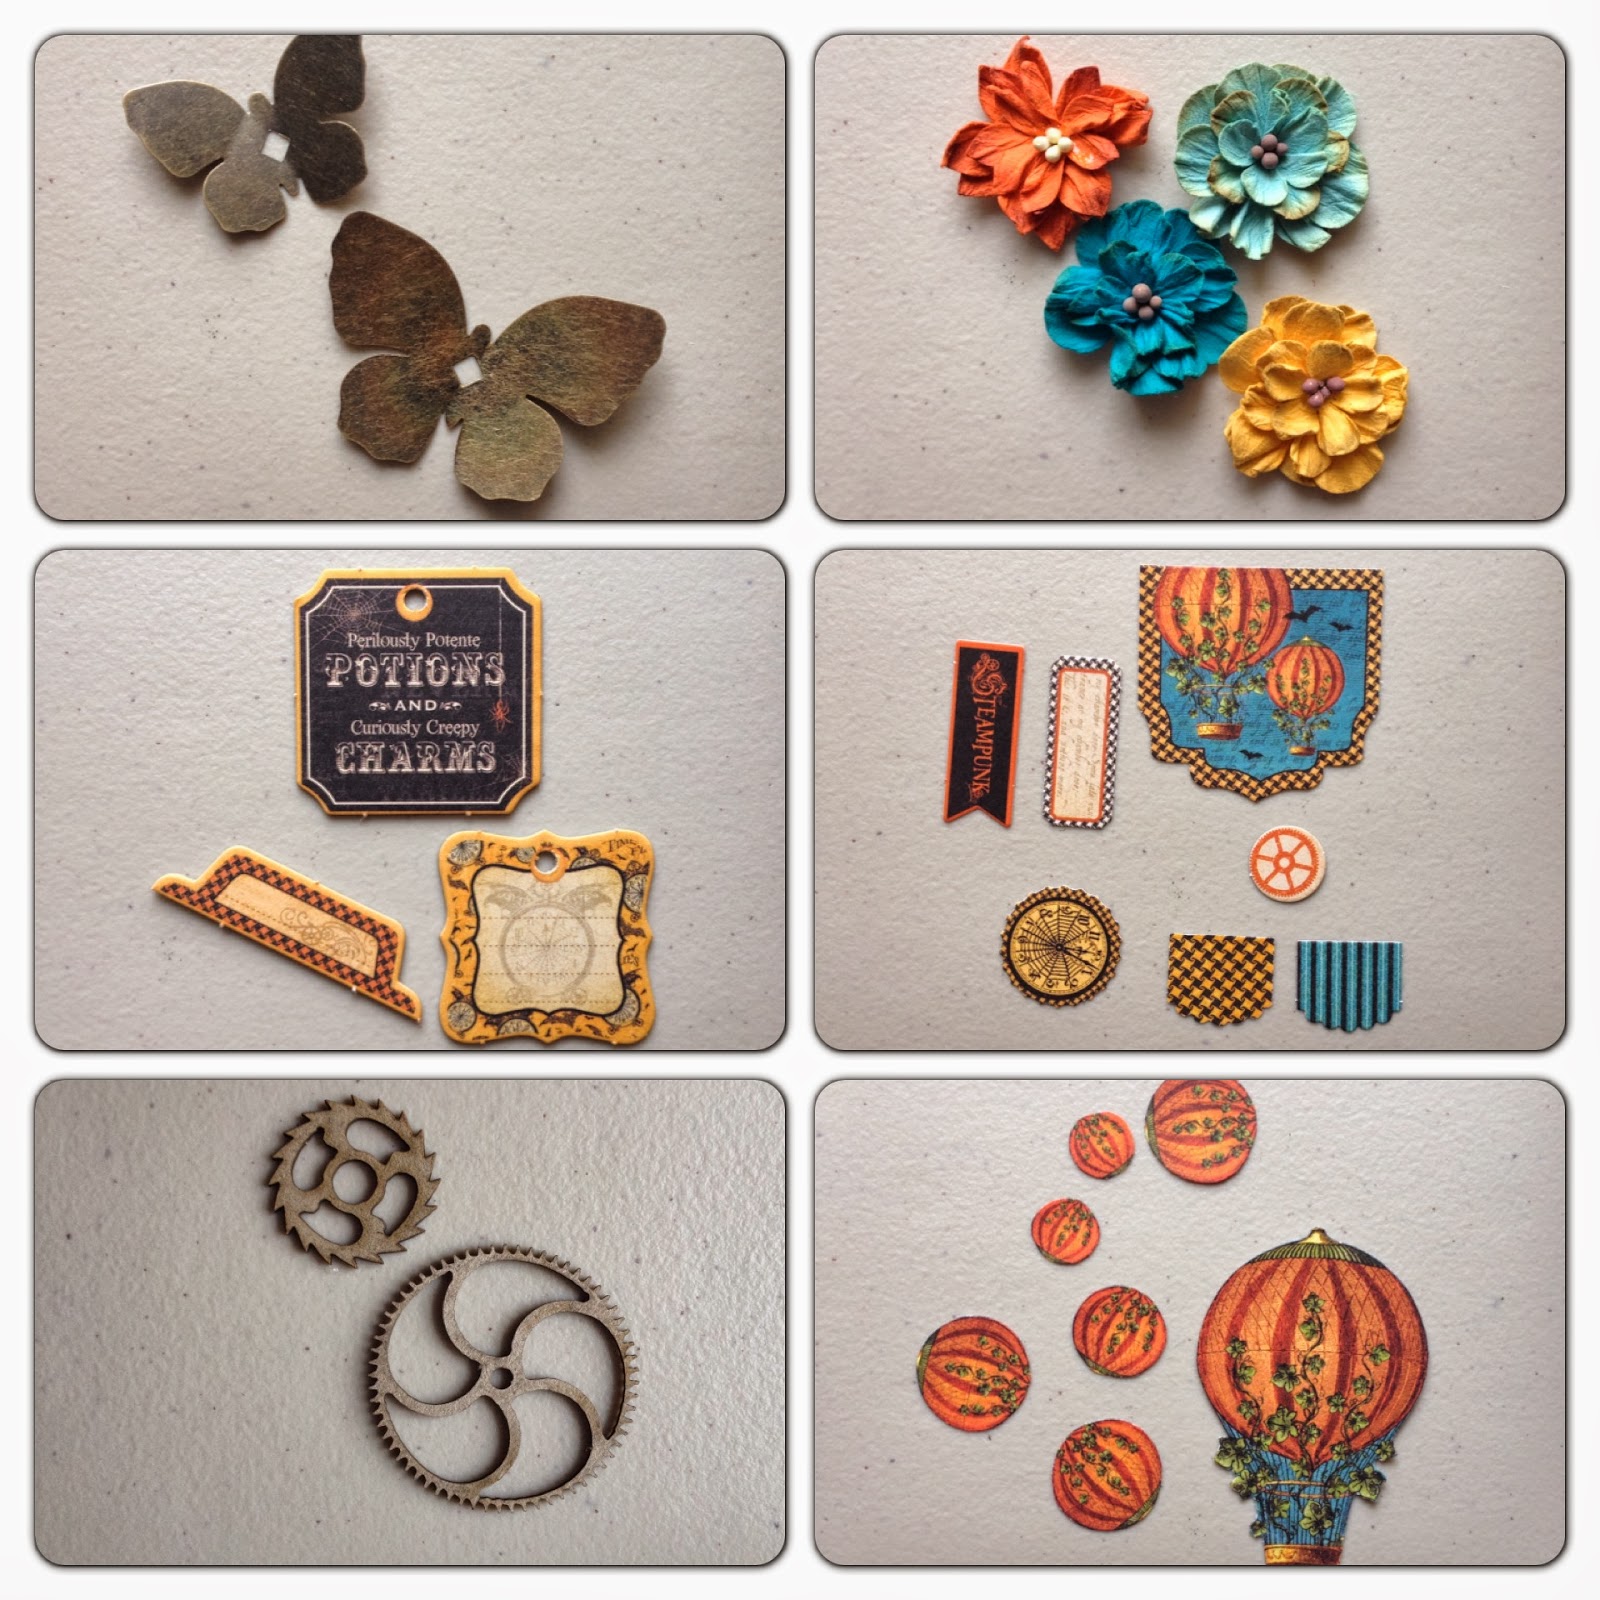
Step 5. Gather a small and large metal butterfly, some Petaloo Dahlias, Steampunk Spells chipboard pieces, Steampunk Spells banners, and (2) chipboard gears such as these ones from Petaloo. From your Pumpkin Power paper, fussy cut (1) large pumpkin hot air balloon. Fussy cut just the pumpkin part for (4) medium-sized pumpkins and (3) small pumpkins.

Step 6. Arrange all your paper onto the layout. Adhere once you’re happy how things look! Trim your photo to a 4” square and adhere using foam dots.

Step 7. Adhere banners to upper right. Attach small fussy cut pumpkins with foam dots.

Step 8. Adhere your embellishments per photo. Use Place In Time alphabet sticker sheet to create the phrase “Where’s my treat?” (Use a #1 sticker for the apostrophe.) Optional: apply glossy accents to pumpkins in upper left and lower right corners. Apply Platinum Stickles to butterflies and fussy cut pumpkins.

Monday, September 9, 2013

G45 Tag Bag Tutorial

Today on the Graphic 45 blog, we're highlighting a couple different projects using Graphic 45's regular tag album. My project below is featured, along with an amazing mini album made by Annette Green!

G45 is giving away a fun Place In Time prize pack this week! To win it, just leave a comment on Graphic 45's blog or Facebook page. Thanks so much for looking and have a great day!


Supplies

Graphic 45 Paper
8” x 8” Place In Time August Cutouts
12” x 12” Place In Time August Cutouts
12” x 12” French Country Sunflower
12” x 12” French Country Bon Appetit

Graphic 45 Embellishments
Regular Tag Album
Ornate Metal Key Holes
Chipboard Buttons Staples
French Country Chipboard 2

Additional Products
Core’dinations Tuscan Sunset
Lifestyle Crafts Whimsy embossing folder
(2) 12” long green & yellow May Arts ribbon
Glimmer Mist – Diamond
Stickles – Copper

Tutorial


Overall note: Ink all edges with Walnut Stain Distress Ink before adhering.


Step 2. Take two regular tags and trace onto the blue strip. (Note: If you want, you do not need to trace the hole in your paper; the hole is actually covered up by chipboard embellishments later on.) Then, adhere these to both tags on the side of the tag where the metal grommet is flattest. Trim corners.


Step 3. Take the green strip and cut the following: (2) 2 1/8” wide and (2) 3 7/8” wide. Locate your Tuscan Sunset paper and trim off (2) 3 7/8” wide x 2.25” tall pieces. Emboss with your favorite embossing folder. Adhere these to the bottom of the other side of your tag. Adhere the 3 7/8” wide green pieces to your tags, above the Tuscan Sunset paper. Trim corners.


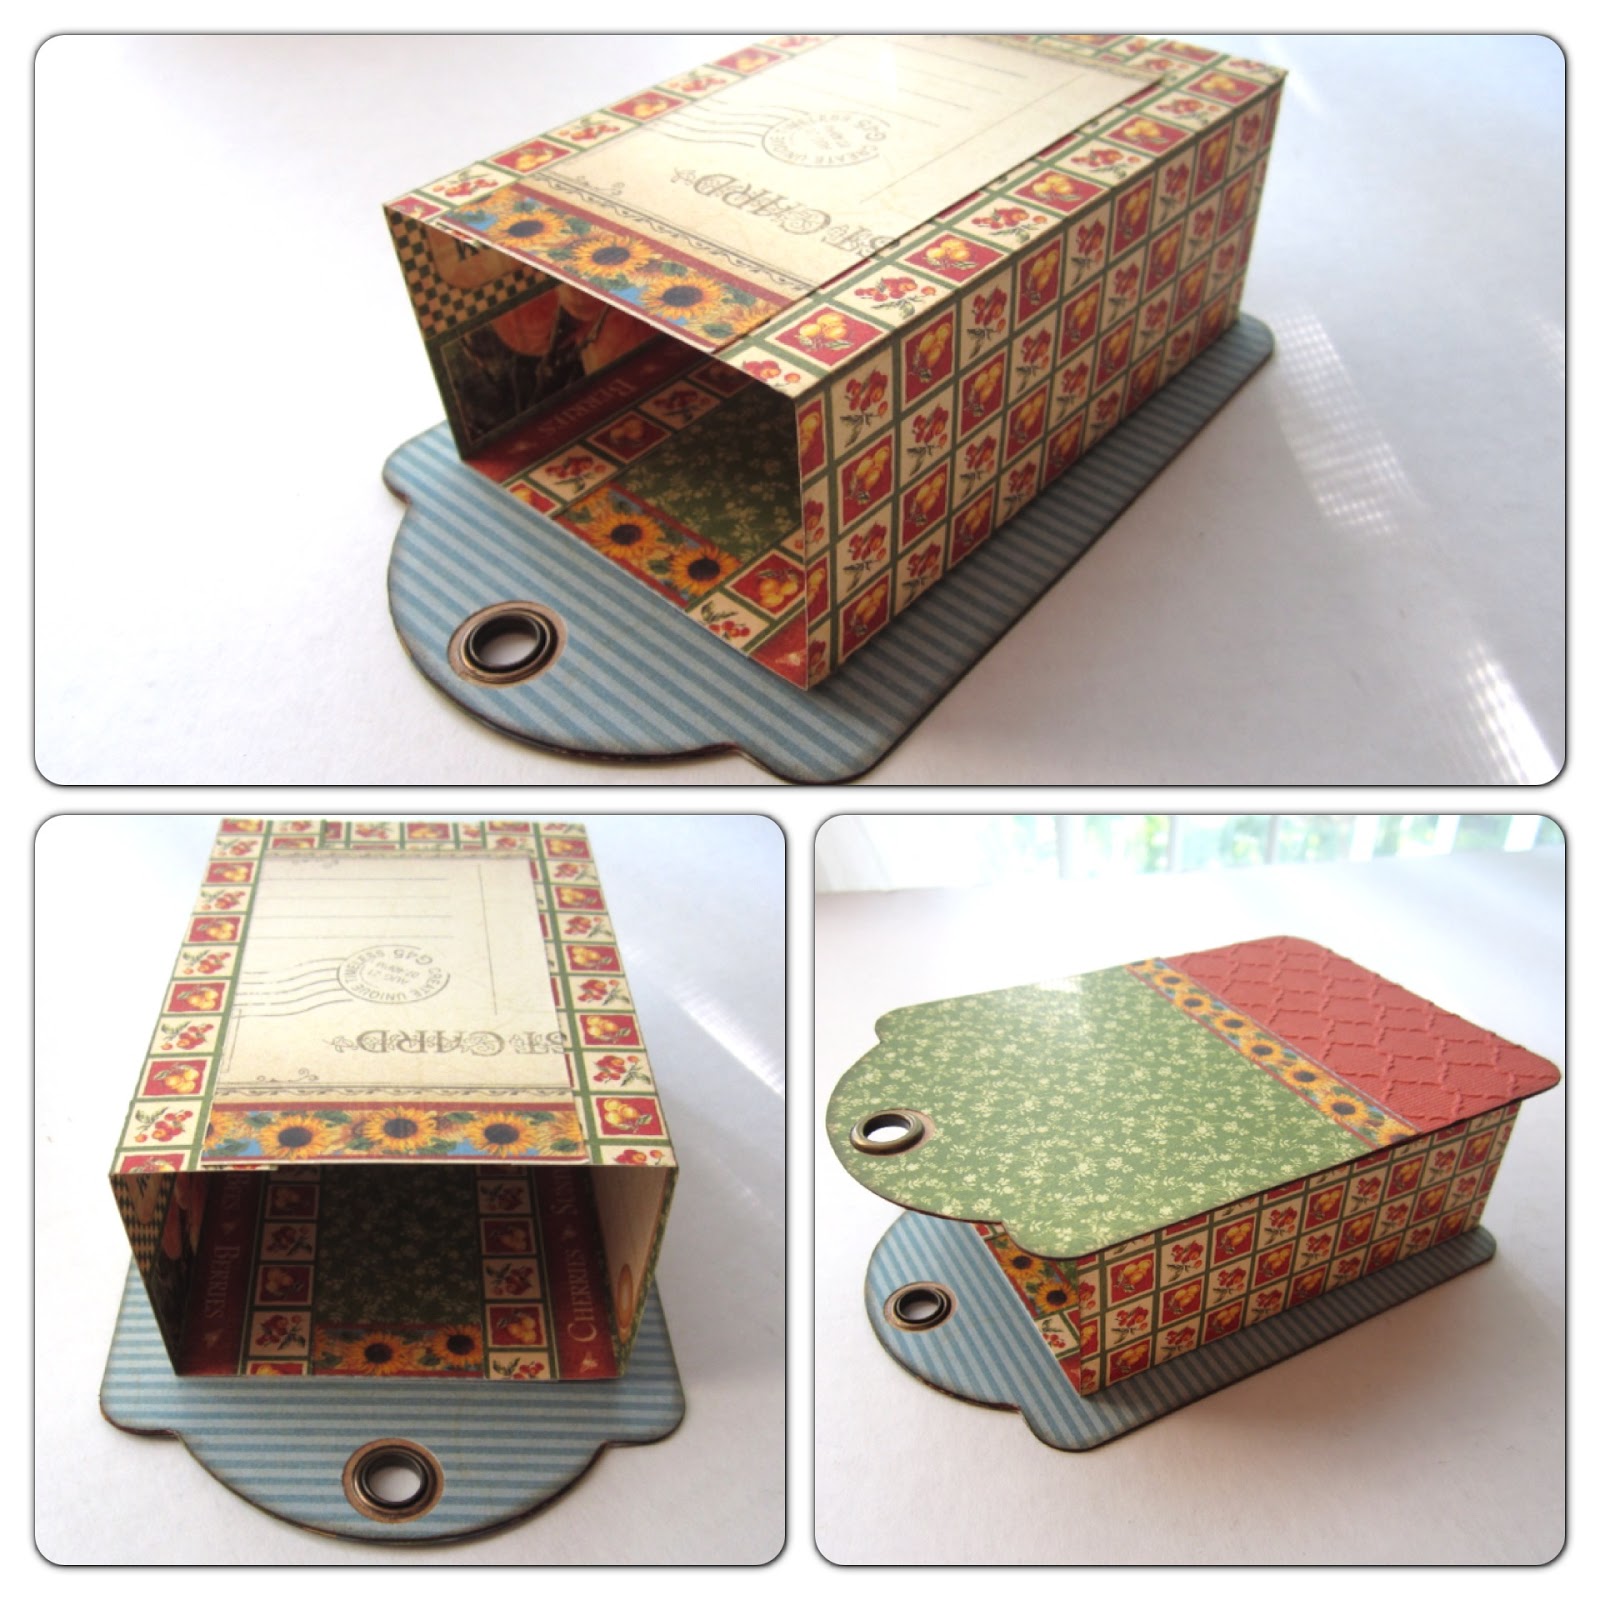
Step 4. Place your gingham pattern strip length-wise in front of you. Score it 4.5” from the left and 4.5” from the right. Then, score the top (2) rows of gingham lines and the bottom (2) rows. Make cuts in the top and bottom middle of the paper and fold to make a “U” shape.


Step 5. Take your 2 1/8” wide green pieces and adhere over the gingham paper per the photos, making sure that the green side faces inwards. You just made the little box for the inside of your bag!


Step 6. Take your box and place glue on one side. Adhere it to the blue side of one of your tags, ensure that it is centered and flush to the bottom. Then adhere the other tag.


Step 7. Cut out the following pieces from your 8” x 8” August Cutouts paper. Set aside. Fussy cut about 7 – 8 large sunflowers and leaves from the Sunflower paper.


Step 8. Locate the red and blue French Country chipboard 2 tags. Fussy cut the August Cutouts patterns per photos and adhere with foam dots. Tie 12” of green ribbon through each tag. Cut out images from Bon Appetit paper.


Step 9. Arrange pieces per photo and adhere. Use foam dots to add dimension.


Step 10. Arrange pieces per photo and adhere. Use foam dots to add dimension. 


Step 11. Cut out the following border pattern from your 8” x 8” August Cutouts. Adhere the ends to the sides of your bag. Adhere ornate metal keyholes. Locate 2 chipboard button staples and adhere behind chipboard tags. 

Step 12. Spritz bag with Glimmer Mist in a sheer color like Diamonds. Apply Copper Stickles to center of sunflowers.


Wednesday, July 3, 2013

G45 Happy 4th of July Kite Tutorial

Good Morning!

Today is the last day of Graphic 45's special sneak peeks of Mother Goose. I don't know about you, but I plan on stocking up quite a bit on this paper line! It is so heartwarming and nostalgic ... and as a soon-to-be-auntie, I know I'll my fair share of nephew projects to make. ;)

You can win Mother Goose before it hits the stores! Just leave a comment on the Graphic 45 blog or Facebook page and you might be one of four lucky winners! You'll also want to stop by the blog today to check out a very special project by fellow design team member Nichola Battilana, along with my 4th of July kite that I made below!


Opportunity knocks in the land of Lady Liberty!


G45 Happy 4th of July Kite from Maria on Vimeo.

~Supplies~

Graphic 45 Paper:
Place In Time 12” x 12” July Foundation
Place In Time 12” x 12” July Cut Outs
Place In Time 8” x 8” July Foundation
Place In Time 8” x 8” July Cut Outs 

Graphic 45 Embellishments:
8x8 Matchbook Box
Place In Time Alphabet Stickers
Place In Time Stickers
Place In Time Tags 2
Regular Tag Album
Ornate Metal Door Plate and Knob
Ornate Metal Door Pulls
Ornate Metal Keys
Alphabet Sticker Staples 

Additional Products:
4’ gold, 2’ red, 6” blue May Arts ribbon
Core’dinations Triumphant Red
Core’dinations Bon Voyage
Core’dinations Crème Brulee
Petaloo Darjeeling flowers
Embossing folder of your choice
Prima mini roses - white

~Instructions~

Overall note: Ink the edges of all papers that you trimmed and fussy cut with Vintage Photo Distress Ink before adhering.

Step 1: Remove base from your 8x8 Altered Matchbook Box and set aside. Ink all edges of your matchbook box lid with brown ink.


Step 2: Take your red Core’dinations paper and cut (4) pieces that measure 1 3/8” x 8 3/8”, (2) pieces that measure 1 7/8” x 8 3/8”, and (1) 3 7/8” x 2.75”. Take the (4) 1 3/8” x 8 3/8” pieces and adhere to the front of your lid.


Step 3: Take your blue Core’dinations paper and cut a 8.25” x 8.25” square. Adhere to the back of your lid.


Step 4: Locate your 8” x 8” Place In Time July Foundation and cut out a 5 3/8” x 5 3/8” square from the center.


Step 5a: Attach Ornate Metal Door Plate and Knob to July Foundation paper, then adhere to red paper. Step 5b: Adhere Ornate Metal Door Pulls and mini roses to top and bottom corners. Adhere blue Petaloo flower to Door Plate.


Step 6a: Locate your 12” x 12” July Foundation paper. Fussy cut “July” with the flourish and cherries; fussy cut the smaller flourish and cherries. Optional: apply Glossy Accents to cherries. Step 6b: Fussy cut (2) parts of the border. Step 6c: Use your regular tag album to trace a tag shape, then cut out.


Step 7a: Using your leftover July Foundation paper, cut a 5” x 1” strip. Make dovetail cuts on both ends, then fold to create a banner shape. Apply Place In Time stickers. Step 7b: Trim one of your borders to 2 7/8” long and apply Place In Time stickers. Step 7c: Take your 12” x 12” July Cut Outs paper and cut out all images, borders, and tags.


Step 8: Arrange additional Petaloo flowers, “Cheery Greetings” tag, seagull stamp, fussy cut flourishes, and blue border cut into (3) 4” long pieces per photo.


Step 9a: Locate white Core’dinations paper and cut a 8.25” x 8.25” square. Locate 8” x 8” July Cut Outs, flip over to reveal solid colors, and adhere to white paper. Step 9b: Attach Place In Time stickers and blue ribbon to tag with blue border. Step 9c: Arrange all pieces in photo then adhere using foam dots. 


Step 10: Place 8” x 8” July Cut Outs paper inside lid and adhere. Easiest step so far! ;)


Step 11a: Take (1) tag from your regular tag album and trim (2) borders to fit the tag. Take 3 7/8” x 2.75” red paper and emboss. Adhere borders and red paper, then attach image of kids with foam dots. Place 6” of gold ribbon through cherry chipboard button and adhere. Tie red ribbon around binder ring. Step 11b: For reverse side of tag, find remaining blue paper, cut a 3 7/8” x 2.75” piece, and emboss. Trim border to fit and adhere. Attach “liberty” image with foam dots and adhere shell stamp.


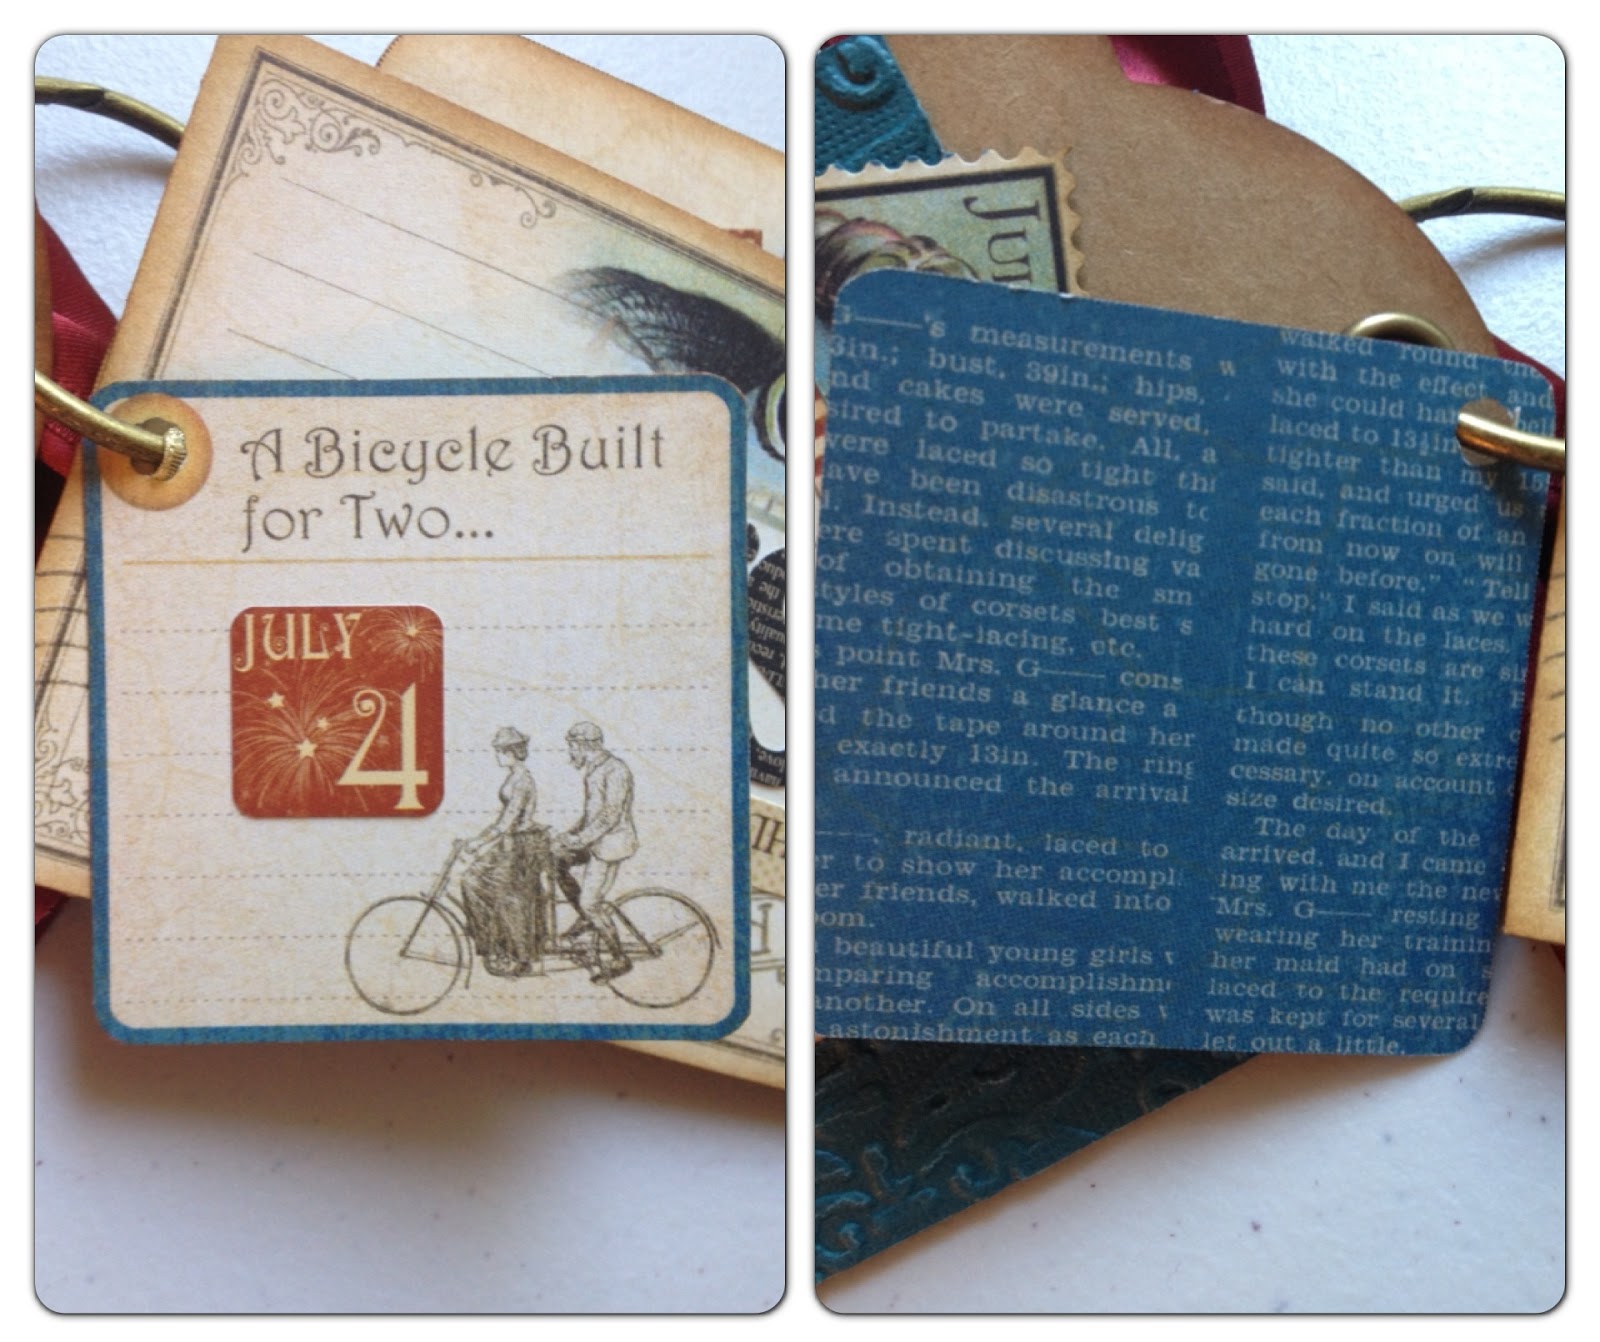
Step 12: Punch hole through “A bicycle built for two” tag. Attach July 4th sticker and insert through binder ring.


Step 13a: Punch hole into top center of postcard. Adhere “Happy Birthday” Place In Time sticker and alphabet letters “USA”. Step 13b: Flip postcard over and adhere border. Attach lady & gentleman image with foam dots and slip “Celebrate” ticket sticker behind.


Step 14a: Locate the tag you traced and adhere “Home Run” tag, turtle stamp, border and “July 4th” sticker. Attach lady image with foam dots. Step 14b: Flip tag over and adhere tag, crab stamp, and “July” border. Attach lady image with foam dots.


Step 15: Tie 12” of gold ribbon to “Souvenir” chipboard tag and 10” of gold ribbon to lady chipboard tag. Tie 2’ of gold ribbon to tag album binder ring.


Step 16: Pierce a hole in the top and bottom corners of your lid. Take gold ribbon with attached pieces from Step 15 and tie through the hole you punched in the bottom corner. Tie a red ribbon between gold ribbon and matchbook box. Use fishing line through top hole so you can hang your kite. 


Thanks for looking and for all of you in the U.S., have a safe and happy 4th of July!!