Pages

Sunday, August 7, 2011

More Birthday Cards

Here are a couple cards I made this week ... one for someone my mom knows, who is really into the whole great outdoors thing, and the other for one of Scott's aunts (who loves cats).


For the bow on the camping card, I used white raffia and inked it with some Walnut Stain - it makes the raffia look kinda like bark!


Paper Mermaids had a jar full of these little bells - I thought they'd make for a truly fun embellishment on the cat lover card.

Supplies:

Spellbinders Labels 8 die
October Afternoon paper
Tim Holtz Distress Ink - Scattered Straw & Walnut Stain
Cuttlebug Swiss Dots embossing folder

Wednesday, August 3, 2011

Card Trio

The other day ago, I challenged myself to make a set of 3" x 4" cards using scraps and the same piece of  turquoise-colored cardstock that I embossed with a Tim Holtz folder.

For the first card, I cut the embossed cardstock to 2 2/8" x 3 2/8" and saved the rest for my other 2 cards. I used the Sew Easy stitcher to create holes around the front, which I filled in with marigold-colored floss. I then cut out a Spellbinders die and stamped an adorable sentiment on it. As always, I applied some prima flowers and a pearl, two of my favorite embellishment pieces. I lightly inked the edges with Distress Ink and called it good. 


The second card contained some Tim Holtz Brackets dies that I had cut, along with some Sizzix Buttons,  an adorable die set that I couldn't pass up at $4.99. I always thought that blue colors cut with the Brackets dies created sort of a wave effect ... hence, the "Come Sail Away" sentiment that I stamped with a $1 stamp set from Michaels. 


I used some of my favorite Graphic 45 paper for my last card, along with some new doggy stamps that I got. I figured I'd try them out ... I think they'll do for my dog books that I'll be making later this summer! I also used some lace to frame the dog and applied a couple teal pearls around the sentiment. 


This was definitely a fun challenge ... It's always fun to see what you can make with what you have lying around. :) Thanks for stopping by!


Supplies:

Tim Holtz Distress Ink - Chipped Sapphire, Rusty Hinge, Broken China & Scattered Straw
Sizzix Tim Holtz Damask & Regal Flourishes embossing folder
Sizzix Buttons #5 die
Teal pearls
Sew Easy Stitcher

Westie Birthday Card

Scott's grandma loves West Highland terriers, so I decided to make her birthday card with a Westie theme. My MIL gave me a Westie stamp and a couple paw print stamps a while back which came in quite handy for this project.

I remember seeing this salmon-colored polka dot paper at Paper Mermaids and knew I had to get it. What can I say, I love polka dots! It ended up being a cute backdrop for a dog theme, so I added some white and black to the card, embossed the stamps, and applied this pretty lace that Sue gave me.


Supplies:

Cuttlebug Textile embossing folder
Ranger Embossing Powder in Sea Foam white & black

$1 Coach bag!

Ever since I got bit by the craft bug, I've wanted to make my boss something crafty, but couldn't settle on what I wanted to make her. At first, it was a photo frame with some embellies on it. Then it was a purse-shaped album. I kicked all these ideas around and kinda let it go for a while, as I wanted to make sure whatever I made her, that it was something well-thought and something specific to her interests.

On my craft table, I've had a growing number of cardboard objects just piling up. Toilet paper rolls, a taco shell box, a Saltine cracker box, and a cake mix box that cost $1. I looked at that cake box one day and the idea came. A Coach bag made from cardboard! You see, my boss LOVES Coach handbags, and I figure one more wouldn't hurt. ;) I figured it would be a glorified coupon holder - so it would actually have some function to it. 

Before the idea came to me, I had bought a piece of October Afternoon paper from Paper Mermaids that just spoke to me. It was this light green paper with flourishes on it, and while I didn't have a specific project in mind, I knew I had to have it. Well, that paper turned out to look just like the kind of design you'd see on a handbag, so it was the first thing I grabbed for to make the purse. To make the purse as realistic as possible, I went on the Coach website and searched for a few different handbag styles to make. I drew three sketches and ended up choosing a style that I could totally see my boss sporting. I then cut open the box and lined the inside of the purse with light green cardstock, and saved extra cardstock as trim for the outside of the purse. To hold everything together, I used Claudine Helmuth Studio gloss, which bound the cardstock rather quickly to the cardboard. While I don't use the studio gloss very much, when I do, I'm always impressed because the paper feels so attached. 

I used some gold cardstock as accents for the strap, as well as for the tags. I used a Spellbinders die to create the main label patch, which I used for both the inside and outside of the bag. I used the same die to hold the straps to both sides of the purse. As for the tags, I stamped the word "Coach" using versamark ink and embossed it using Ranger "seafoam white" powder. I created another tag and used glossy accents and then Tim Holtz fragments to create a more authentic look. 

I was so excited to give Jody the handbag that instead of just leaving it for her to find, I spilled the beans and told her I had something for her. (I always seem to ruin surprises at work.) I had so much fun making the handbag that I may have to make my own someday!


Supplies:

October Afternoon - 5 & Dime paper - Jawbreakers
Spellbinders Label 11 die
Gold cardstock
Tim Holtz - Idea-ology - Ball Chain
Martha Stewart Custom Stamp Set
Sizzix Scallop Tag

Taught my first card class!

A couple months ago, the ladies at Paper Mermaids asked me to teach a card class! I was so honored and surprised that they asked me, and not to mention, deathly nervous.

My task was to design 4 cards using materials from their store. I wanted each card to have something different to it other than the sentiment, so my first card featured a heat-embossed sentiment, the second used glimmer glass and glimmer mist, the third involved tying a ribbon, and the fourth included an embossed element in the background. 

Here are the cards I designed for the class: 


I learned something very important. Unless you employ a sweatshop of 3 crafty ladies, you absolutely cannot cut, ink, or emboss all your materials the day of your class. I know, I know ... I thought it would only take a few hours. Who knew that all that prepwork would take an entire day! If the ladies hadn't stepped in ... eek ... Thank you Carol, Lisa, and Karen for all your help!! I owe you!! Next time around, I'll start cutting all my kits 2 or 3 days ahead of time. 

Well, the class was a success, and I believe everyone (including the semi-frazzled instructor) had a good time. The group was easy-going and everyone got along great. I wanted the ladies to learn something new with each card, so I had them apply their own glimmer glass, heat emboss their sentiment, and roll their cardstock through my Big Shot machine. Perhaps the best compliment of the day was being asked when my next card class was! Paper Mermaids got some fun Christmas paper in already, so my next designs may have a more fall- or Christmas-y kind of theme! Stay tuned, ladies. 

Tuesday, August 2, 2011

Fashionista Birthday Card

Earlier last month, I was in Corvallis and decided to stop by Creative Crafts & Frame Shop on Kings Boulevard. While there, I found a fun paint can that I used for a new baby project, along with some Graphic 45 "Fashionista" paper for my friend Chelsey's upcoming birthday.

Chelsey is one of the most stylin' girls I know. Not only is she gorgeous, but she has quite an eye for fashion! Seriously, even when the woman's preggers, she looks fabulous. So of course, the Fashionista paper was more than fitting.

For the front of the card, I cut out part of the Fashionista page, added a sheer cream-colored ribbon and a few navy pearls. I also used my trusty Sizzix Scallop tag to hold my sentiment, which I stamped and embossed. (I'm so grateful that the ladies at Paper Mermaids introduced me to heat embossing - it adds another dimension to your cards that you can't get with a regular stamp effect.)

For the inside of the card, I cut out a piece of red and white paper and used that as the backdrop for more fashion-friendly goodness. I added a scrap I had of some yellow cardstock that I embossed with the Cuttlebug "Textile" embossing folder, along with some flowers I cut out from a piece of coordinating Graphic 45 paper called "Potpourri".

The back of the card has a Spellbinders Lacey Ovals die; it's one of my favorite dies to play with. I really like how Chelsey's card turned out and can't wait to drop it in the mail tomorrow!


Supplies:

Cuttlebug - Textile embossing folder
Graphic 45 - Fashionista paper
Navy pearls
Bazzil cardstock
Spellbinders - Lacy Ovals

Anniversary card

July 11th marked my two year anniversary with my husband Scott. Now, as supportive of my crafting as he's been, I didn't want to make him a super girly/ultra frilly anniversary card. He's built up quite an impressive supply of camping and survival gear, so with that in mind, I set out to make him as outdoorsy and manly a card as possible. :)

Paper Mermaids got in this fun shipment of camping paper, stamps, and embellies, with my favorite being a set of paper that has nothing but a starry night from corner to corner. I picked up some paper with lots of fun tents on it, as well as some navy corrugated cardboard. I cut the cardboard with the Sizzix Tim Holtz On The Edge "Brackets" die and placed it over the starry night paper. Then I cut out a tent and some trees, applied glossy accents, and used white floss to create a constellation sentiment.

Scott loved his card - and while we didn't go camping, we did enjoy a lovely dinner at The Bay House in Lincoln City. If you'd like a little red carpet treatment, I highly recommend them! The atmosphere, service, and food were so lovely.


Supplies:

Sizzix Tim Holtz On The Edge - Brackets die
Glossy Accents
Corrugated paper

Toilet Paper Roll Mini Book

A little while back, I did a search on crafty paper projects using everyday objects, and I found a few photos and tutorials of mini books made from toilet paper rolls. They were so adorable! I got inspired and decided to make one for my cousin Liz. I loved how hers turned out so much, that I just had to make one for myself! Here's how ...

First, I flattened the toilet paper roll by smooshing it under a bunch of my paper. I then cut it along the two scored lines, resulting in two pieces. The next step was deciding whether to keep the shape as is, or to cut it. I decided to use my Sizzix Scallop Combo #2 tags; a "prize" I obtained from an earlier covert op to Michaels. These dies are absolutely lovely ... unlike a regular tag that's rather square and boxy, these ones have beautiful scalloped tops that add quite a bit of charm and elegance, not to mention, a sure-proof way to get perfectly scalloped tags every time you cut.

I decided to use the TP roll as the front and back of my album, and cut a few pieces of cardstock and gorgeous Graphic 45 "On The Boardwalk" paper using the same die. I cut some fishies out of a piece of paper and applied glossy accents to them ... what a cool effect!

To tie everything together, I used one of the ball and chain sets from Tim Holtz. These are a must if you enjoy making mini books and other whimsical crafts. They're also quite inexpensive - I believe a set of 15 (5 ball/chain combos in copper, nickel, and brushed metal) cost me about $4. Not bad!

Here's a handful of pages from my mini book:


Supplies:

Sizzix - Scallop Tag die
Tim Holtz - Idea-ology - Ball Chain
Graphic 45 - On The Boardwalk paper
Tim Holtz Distress Ink - Broken China

Recipe Book

A co-worker of mine loves cooking and loves sweets - so I decided to make her a recipe book. I used an envelope and tag album that I bought from Paper Mermaids along with a healthy dose of Tim Holtz Distress Ink and country charm, ala October Afternoon paper. I used the envelopes as meal type dividers ("breakfast", "lunch", "dinner", and "dessert") as well as placeholders for additional recipes. As for the tags, I made little "ingredient" and "directions" templates on each, and even threw in my lemon bar recipe. ;)

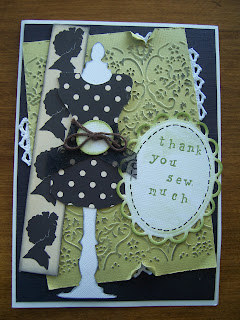
I lost all the photos I took of the project, but thankfully, my mom-in-law had snapped a photo of the cover on her camera. This was actually my favorite part of the project, as the cover of any scrapbook or minibook totally sets the tone for the rest of the book. I used some blue gingham paper from the Graphic 45 "Magic of Oz" line, then added a couple October Afternoon elements that I applied glossy accents to. The mannequin was created with the Sizzix Tim Holtz Sewing Room die, which I dressed up with some more Graphic 45 paper, a white apron, and my favorite crochet ribbon tucked in at the bottom.


Supplies:

Sizzix Tim Holtz - Sewing Room die
October Afternoon - Five & Dime paper
Glossy Accents
Tim Holtz Distress Ink - Chipped Sapphire & Rusty Hinge
Graphic 45 - The Magic of Oz & On The Boardwalk paper

Father's Day Card

My FIL loves music. He owns 2 Breedlove guitars and a bass, so really, I'm serious when I say he loves music!

For Father's Day this year, I decided to make Steve a card that encompassed his love for music along with his growing guitar playing skills. I found the perfect stamp in one of Joann's $1 bins ... and the perfect paper, which happened to be Graphic 45 "Curtain Call" leftovers from the retirement card I made for John Baker.


Supplies:

Graphic 45 - Curtain Call paper
Tim Holtz Distress Ink - Walnut Stain

As for my dad in Portland, I failed to take a picture of the card I made for him, but hope to snap one the next time I'm in town. His card had a beach-theme with a fun Graphic 45 image of a dad going swimming with his kids. So cute.

Do Not Disturb Sign

Now that I'm obsessed with scrapbooking and papercrafting, I finally have something unique that I can give to friends and family. I've been on a rampage the past few months and hoped to share all of my creations here, but alas, my laptop froze up on me last week and I lost ALL my projects. Fortunately, I got my laptop fixed, and there are still a few things lying around the house that haven't been dished out yet to loved ones, so I've re-snapped some photos and will post them all soon!

I wish I had a better picture of this door sign I made for a co-worker, but this pic I took from my phone will have to do, so forgive me for the quality! Anyhoo, the idea behind this project came from the fact that Kris is a busy, busy woman, and that she really enjoys her R&R whenever she can get some. Kris is such a hard worker and she really gives her all. Not to mention, she's the mom of 5 kids and a doting wife! What could be more perfect for her than a fun sign she could hang outside her door whenever she needed some time to herself.

I started with a piece of cardboard from a cereal box. My friend Lisa from Paper Mermaids gave me this tip when I first started crafting and let me tell you, it is amazing what you can do with recycled cardboard! I then grabbed this pretty blue and green print paper as the base, and applied a Spellbinders die cut to the center. I stamped it with the sentiment "No Margarita, No Enter!" and then placed die cut flourishes around the oval. Some Spellbinders butterflies were also added, and I tied everything together with some pretty green tulle and a button.


Kris informed me that she's also in need of a sign that says "It's 5 o'clock somewhere". This sign was so much fun to make, so I'm excited to put another one together for her!

Supplies:

Recycled cardboard
Spellbinders - Lacey Ovals
Spellbinders - Butterflies 2
Sizzix - Flourishes dies
Tim Holtz Distress Ink - Peeled Paint & Broken China
Tulle
Twine

FIL's Birthday Card

Paper Mermaids carries this adorable line of October Afternoon paper called 5 & Dime. One of the papers (titled "Root Beer Barrels" - how cute!) features this cute spread of nostalgic things like ice cream, kites, and birthday cakes - the perfect kind of paper for a birthday card!

I picked up some of this paper for my father-in-law, whose birthday was back in June. To change things up a bit, I decided to make his card an accordian-style card with 3 pages. I cut out a few of the images and glued them on to each page, stamped a Martha Stewart doily stamp around the images, then applied some sentiments.

My FIL loves chocolate, so I was so stoked that the paper included a chocolate cake! Of course, nothing's better than the real thing, so we made Steve a real-life chocolate cake to match. It was definitely a sweet day. ;)


Supplies:

October Afternoon - 5 & Dime paper
Martha Stewart Doily Lace Double Edge Punch
Tim Holtz Distress Ink - Chipped Sapphire